Image Source: POPSUGAR Photography / Renee Rodriguez
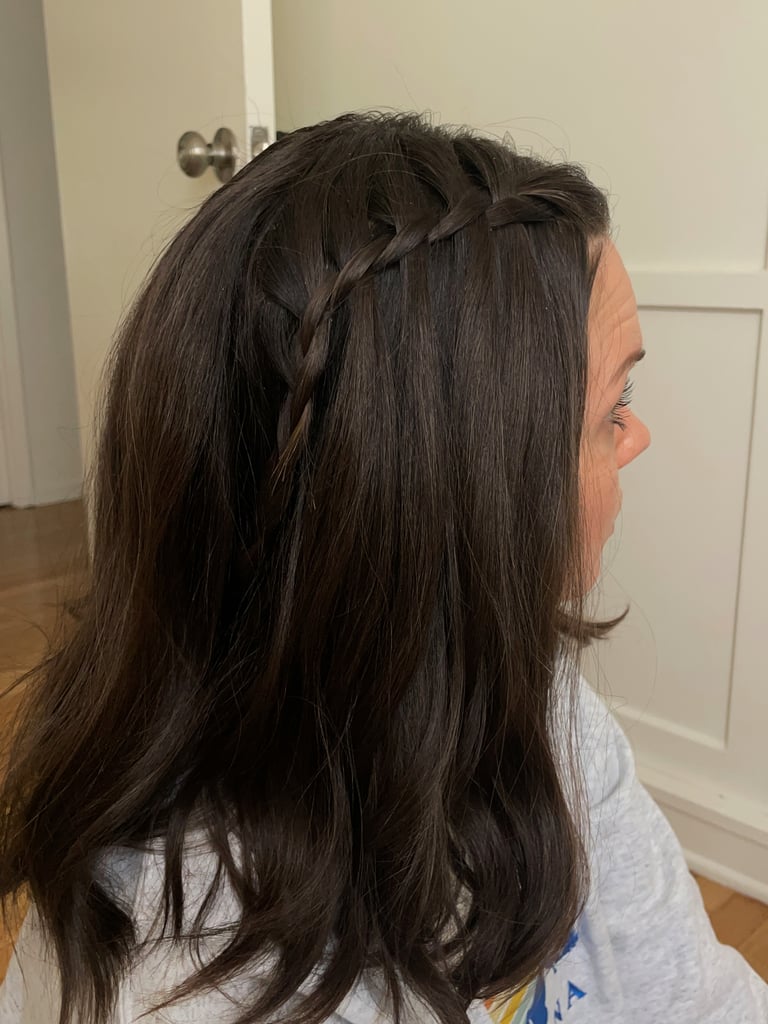
Out of all the amazing hairstyles filling up our Pinterest feeds these days, intricate braids tend to be the styles that stop us in our tracks most often. The specific look we’ve been wanting to learn the most, however, is the waterfall braid. This romantic braid has a whimsical feel with draping pieces that can act as stand-alone designs or just add visual interest to an otherwise ordinary hairstyle.
The thing about enchanting-looking hairstyles like the waterfall braid is that they often appear to be more challenging than they really are. In fact, we’d argue that waterfall braids are one of the easiest braid styles to DIY. The look essentially involves starting the braid like you would a cornrow, but instead of braiding all the sections of hair, one section “falls” between the other two and the “braid” becomes more of a flat twist with hair falling through each twist.
We know it’s probably easier to show you rather than tell you, so if you still don’t believe how easy it is to DIY waterfall braids, we asked hairstylist Olivia Halpin to break down exactly how to do a simple waterfall twist that we promise you can easily pick up at home. The best part is you’re meant to wear the braid with the rest of your hair down, so you don’t have to fuss with trying to make a ponytail look good, too. Keep reading to see the step-by-step waterfall braid tutorial that will have you feeling like a pro in no time.
— Additional reporting by Ariel Baker and Renee Rodriguez
Waterfall Braid Tutorial: Step 1
Image Source: POPSUGAR Photography / Renee Rodriguez
To start your waterfall twist, take two sections of hair.
1 / 8
Waterfall Braid Tutorial: Step 2
Image Source: POPSUGAR Photography / Renee Rodriguez
Cross the section of hair along your hairline over the other section, so it’s going away from your face.
2 / 8
Waterfall Braid Tutorial: Step 3
Image Source: POPSUGAR Photography / Renee Rodriguez
Take a new section of hair from the top of your head, and let it fall on top of the section you just pulled away from your face.
3 / 8
Waterfall Braid Tutorial: Step 4
Image Source: POPSUGAR Photography / Renee Rodriguez
Drop the section of hair you just placed so it falls through your twist, creating that waterfall effect.
4 / 8
Waterfall Braid Tutorial: Step 5
Image Source: POPSUGAR Photography / Renee Rodriguez
Take the bottom section of hair, and pull it over the waterfall section. Then take another section of hair from the top of your head to make another waterfall piece, then let it fall through the other sections of hair. Repeat the process until your waterfall braid is the length you want it. For this look, we just braided one side until it reached the back of the head.
5 / 8
Waterfall Braid Tutorial: Step 6
Image Source: POPSUGAR Photography / Renee Rodriguez
Once you reach the end, extend the woven section of hair with a regular three-strand braid and secure with a clear elastic.
6 / 8
Waterfall Braid Tutorial: Step 7
Image Source: POPSUGAR Photography / Renee Rodriguez
To hide the braided end, tuck it under the layers in the back of your head. Pin it in place with a bobby pin.
7 / 8
Waterfall Braid Tutorial: Step 8
Image Source: POPSUGAR Photography / Renee Rodriguez
Drop your layers over the pinned-back braid, and admire your pinnable hair.
8 / 8
>>> Read full article>>>
Copyright for syndicated content belongs to the linked Source : PopSugar – https://www.popsugar.com/beauty/Easy-Waterfall-Braid-Tutorial-33068171
