
In triathlon, transition (switching from one sport to the next) might seem like a miniscule part of race day. But this often overlooked ‘fourth discipline’ is actually pretty crucial. Over the years we’ve seen transition blunders and mistakes have a huge impact on race dynamics – and even lead to penalties or disqualifications.
So while triathlon might on the surface seem like it’s all about the swim, bike and run. Nailing your transitions is also key to race day success. We talk you through what transition is, how to set up your transition zone, the key rules you need to be aware. And share some top tips to help you speed up your transition times to shave vital seconds off your overall finish time.
What is a triathlon transition?
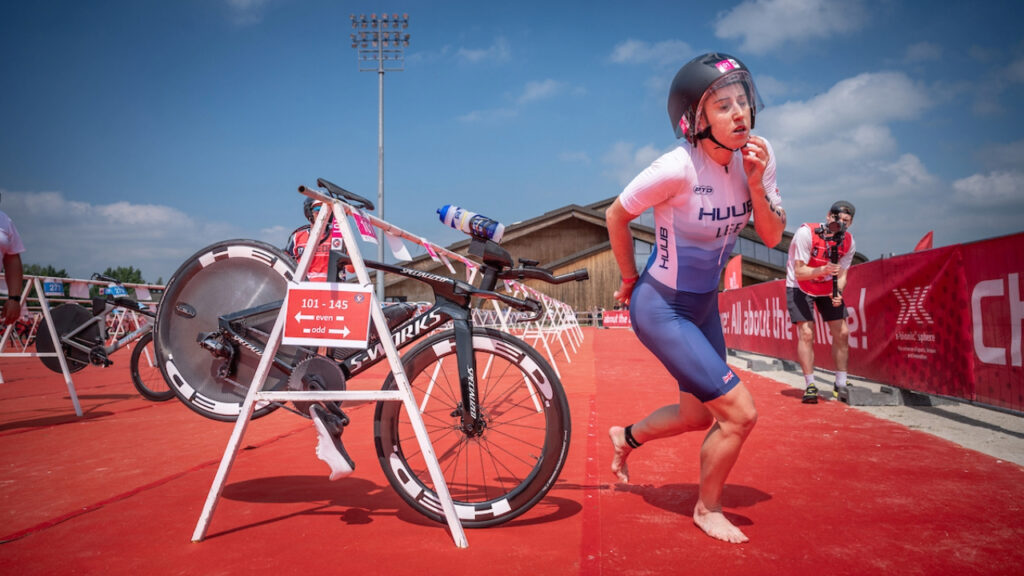
Transition is often referred to as the ‘fourth discipline’ of triathlon. Put simply, in the world of triathlon a transition is the act of switching (transitioning!) from one sport to the next. Transition 1 (shortened to T1) refers to switching from swimming to cycling. Once you’ve exited the water you’ll run into the transition zone. Here you’ll remove your wetsuit and goggles, don your helmet and race bib number and grab your bike from the rack to head out onto the bike course.
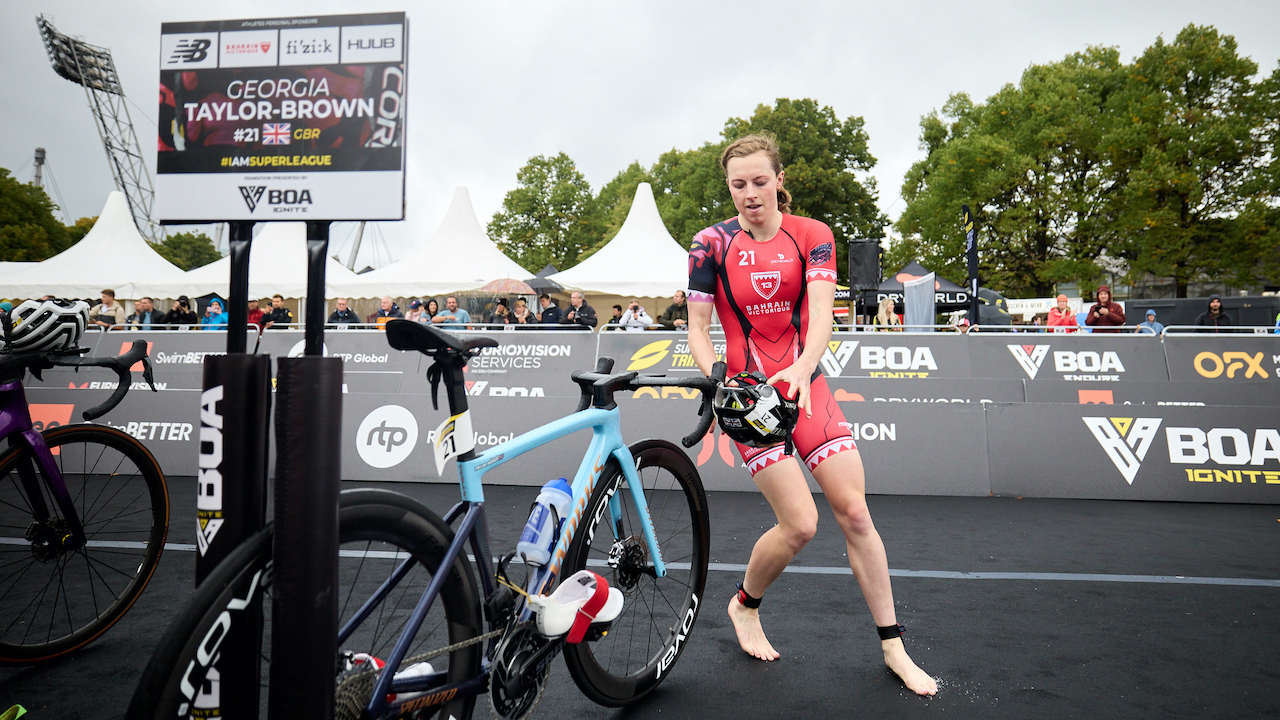

After you’ve finished the cycling section of your race, you’ll get off your bike at a designated dismount like and run with it back into the transition zone. This bike-to-run transition is called T2. Once back in transition you’ll rack your bike, take your helmet off and change into your running shoes.
It’s important to know that the time you spend in transition still counts towards your overall finish time. The clock doesn’t stop. So if you’re looking to achieve the fastest time possible, you’ll want to make your way through transition swiftly.
Triathlon transition rules
While you’ll want to get through transition as quickly as possible, it’s important to know that there are certain rules you must abide by. Make a silly mistake, and you could end up with a time penalty – or worse, a disqualification! As ever, different races may implement slightly different rules so it’s important you always attend the race briefing for any race-specific details. But here are some of the key triathlon transition rules you need to know about.
No nudity in transition (or anywhere else on the course for that matter…)
A quick trip to the portable toilets on race morning might convince you that all sense of dignity and decorum is firmly out of the window in a triathlon. But there are boundaries! If you’re planning to have a full change of clothes between the swim and the bike, and/or the bike and the run. You must make sure you’re not flaunting your birthday suit in transition.
Some races will have a dedicated changing tent where you can strip off to your heart’s desire. But for many smaller races, you’ll have to change next to your bike. This means ensuring you always have some level of clothing on. The easiest option? Wear a tri suit – no nudity concerns, and far less time spent struggling in and out of kit!
Everything in it’s place
Transition needs to be kept tidy. Which means flinging your wetsuit off with reckless abandon or letting your goggles run wild isn’t acceptable behaviour. You need to make sure you take the time to place all of your stuff in your designated spot (or in your transition bag at bigger races – more on that later) so it’s not going to obstruct anyone else.
We’ve seen the PROs get penalties for swim caps that have missed the box or wetsuits that have been left half dangling out. Don’t make the same mistake. Think speed, not haste and make sure you’ve left everything where it should be.
Helmet before bike
It’s essential that you’ve put your helmet on – and fastened it – in T1 before you even think about touching your bike or taking it off the rack. If you start moving your bike before you’ve put your helmet on, or if you haven’t fastened your helmet securely, you can be disqualified.

The same goes for T2, resist the temptation to try and save a bit of time by unfastening your helmet while you’re still pushing your bike back to the racks. It needs to stay firmly on your head until your trusty steed is back in its stable.
Respect the bike mount and dismount line
For safety reasons, there is a designated point as you exit transition which marks where you are allowed to mount your bike. And by which you must have dismounted your bike after the ride. If people were to cycle through transition, there’d be all sorts of crashes and chaos.
Make sure you know where the mount/dismount line is. While it’s fairly tricky to get it wrong when you’re heading out of transition. It can be easy to leave it too late to brake when you’re coming back after the bike leg and accidentally roll right on by. Slow down with plenty of time to dismount before the line, otherwise you’ll risk a disqualification.
Follow the correct directional flow in transition
To make things fair for all competitors, regardless of where their bike is placed in transition, most races will have a specific direction that you must move through in transition. Take the time to get to know the layout of transition before your race starts so you know exactly which direction you need to go. Get it wrong, and you’ll most likely find one of the firm but friendly race marshals will make you turn around and run back from whence you came. Losing vital seconds!


Start your triathlon journey with Brownlee Fitness
How to set up your triathlon transition zone
Being able to transition seamlessly between the different sports in a triathlon, taking as little time as possible while also making sure you’ve got everything you need and you’re not accidentally breaking any rules all comes down to organisation and logistics.
The key to a fast transition is knowing how to set all your gear up so you can get to it quickly and efficiently. There’s a knack to setting up your gear in transition, and how you do it depends on the layout/set-up at your particular race. There two main scenarios at play here. Races where all your bike and run gear has to be set up next to your bike. And races where you’re given transition bags to hang up on hooks, with a gear change area away from the bike racks. We’ll talk you through how to navigate both situations for optimal speed.
How to rack your bike
Your spot in transition is usually allocated based on your race number – though some races do operate ‘free racking’ so you can choose where to set up. Either way, when you rack your bike make note of any landmarks around that will make it easy to find. Or count the number of bike racks so you know exactly where you need to go during the race. Finding your bike when the adrenaline is pumping and there are hundreds of other bikes in situ is trickier than you might think.
Most race organisers will ask you to rack your bike by the saddle. That means you wheel it backwards towards the rack, with the handlebars facing outwards. And you hook your bike onto the bar by the underneath of the saddle. If you’re not sure – ask one of your fellow competitors to help you. Everyone was a first timer once!
Setting up a triathlon transition zone next to your bike
In races where you have to have all your gear laid out next to your bike, be sure to set things out in the order that you’ll need them. Some races will give you a box to use, others will want to minimise bulky items in transition as much as possible and request that you lay your gear out on the floor.
Put your bike shoes in line with your front wheel (if you’re not leaving them already attached to your pedals). Put your bib number belt on top of your shoes, with the buckle unfastened so you can grab it and put it on without any fumbling. Place your helmet just behind your shoes – again with the buckle unfastened so you can put it on easily. If you plan to wear cycling glasses, place these underneath the helmet. Laying out your bike gear in this order means you can work methodically through putting each item on without having to think about it.
Place your running shoes and anything else you want to wear during the run (such as a cap or glasses) just behind your bike shoes and helmet. If you can, leave some space behind your running shoes to put your wetsuit and goggles once you’ve removed them – then they won’t be in your way when you come in for T2.
Put your water bottles in bottle cages on your bike before you start your race so you don’t have to remember to pick them up. And if you intend to take any sports nutrition such as gels while cycling, you might want to get a bento box (or similar) that you can attach to your bike, again so that you can load up your gels pre-race.
Races with transition bags on hooks
Some of the big races such as IRONMAN, Challenge Family and T100 operate a different style of transition. When you register and pick up your race pack, you’ll be handed three different coloured transition bags. The colour depends on the race series, but they’ll be labelled.
The bike bag is where you’ll put everything you need for the cycling section: shoes, helmet, race bib, glasses etc. The run bag is for your running shoes, cap and any nutrition you want to take with you on the run. The third bag is your streetwear bag – you hand this in just before the race start. This is for any non-race clothing you’re wearing before you start, and you can also put things like a towel and warm clothes for after the race in here. You’ll get it back after you’ve finished.
In T1, you’ll exit the swim and grab your bike bag from it’s hook. Take out all your bike stuff and put it on. Then put your wetsuit, goggles and swim cap back in the bike bag and either hang it up again – or hand it to a volunteer (depending on the protocol set out by the race organiser).
After the cycle, you’ll head into T2 and grab your run bag. Again, take everything out and put it on – then place your cycling shoes and helmet back in the bag.
Just as we’ve outlined with setting up your gear in transition next to your bike, it’s worth putting your gear in the bags so that you get to it in the order you need it.
info-circle TOP TIP
The transition bags usually fasten with drawstrings. Resist the temptation to tie a super secure knot in yours. The last thing you want is to spend precious minutes fumbling trying to undo it!


Essential triathlon gear, curated by experts
SHOP NOW
Triathlon transition checklist – what to do on race morning
Race day nerves got your brain feeling scrambled? No sweat! Work through our transition checklist to make sure you don’t forget any of the important details on race morning.
Final bike checks
Particularly if you had to rack your bike the night before your race, the first thing to do when you arrive on race morning is head over to your bike.
Check tyre pressure
Make sure your tyres are pumped up. If you haven’t got a pump, you can usually borrow one in transition.
Click through your gears
Make sure all your gears are shifting. Lift the back wheel and turn the pedal with your hand to get it spinning. Use your other hand to click up and down through the gears. Once you’ve checked all your gears, be sure to leave your bike in an appropriate gear to start the race in. Generally somewhere in the middle is good, so you’ve got enough torque to get momentum but you’re not going to struggle to get pedalling.
Load up your bottles, nutrition and bike computer
If you have to check your bike in the day before the race, it’s best to leave putting your bottles and nutrition on your bike until race morning. Otherwise they’re left to sit in the sun and get warm for hours. If you’re using a bike computer, again attach it to your bike on race morning. Switch it on just before you’re going to head off to the swim start so it’s ready when you head out on the bike. If you’re using a cycling power metre, it’s also a good idea to do one last calibration on race morning to ensure you’re getting accurate readings.
Lay out your gear next to your bike – or put it in your transition bags
Once you’re happy your trusty steed is ready to race, it’s time to lay out your gear. Make sure you’ve got your cycling shoes, helmet, race number, running shoes, run nutrition and any accessories (caps, gloves, glasses) laid out in the order you’ll need them.
Races with transition bags on hooks will usually require that you hand your gear in the day before. But if you have access to your transition bags on race morning it’s always a good idea to double check you’ve got everything you need.
Transition zone walk through
Once your bike is locked and loaded, next take a few minutes to familiarise yourself with the layout and directional flow of transition.
Swim exit to T1
Find where you’ll exit the swim and scope out what direction you’ll need to go in to get to your transition zone.
Bike location
Make a note of where your bike is in transition in relation to the swim exit and T1 entry. Are there any big trees or non-moveable landmarks that will help you find it? If not, can you count the number of racks?
Mount and dismount line
Make sure you know the directional flow of transition and where you need to go once you’ve grabbed your bike to get to the ‘bike out’. Check out where the mount and dismount line is.
Bike in and run out
Finally, walk through where you’ll come in off the bike and where the ‘run out’ is – usually they will be at opposite ends of transition.
Join the toilet queue
Before you put your wetsuit on, make sure you’ve give yourself a chance for one last nervous porta-potty visit. The queues can get long, so don’t leave it until the last minute!
Get swim ready
At least 20 minutes before your official start time, get yourself ready to start the race.
Timing chip
If your race is chip timed, you’ll have been given a timing chip to wear on a strap around your ankle. Make sure you’ve put yours on. We’d recommend using Vaseline or wetsuit lube on the skin around it so it doesn’t chafe or rub.
TRI SUIT/SWIM GEAR AND WETSUIT ON
Get your race kit on, and leave yourself plenty of time to put your wetsuit on properly – if your race requires one. The last thing you want is to have to rush it. You’ll probably end up putting a nail through it, and you’ll be getting to the start line flustered.
Get to the start zone
It’s almost go time! Make your way to the swim start at least 5-10 minutes before your start time. Listen carefully for any final instructions or information from the start line race marshals.
Take a breath, and get excited!
The logistics are done. Your kit is on. And the nerves are probably ramping up. Take a deep breath, take a look around and soak up the atmosphere. The start line is calling, and you’re going to be epic. Let’s roll!
Top tips to speed up your triathlon transitions and save vital seconds on race day
While a triathlon transition might sound like a complicated, logistical nightmare. Once you’ve ticked off a few races, it soon becomes part of your muscle memory. At which point, you’ll probably be looking to improve your overall race times. And while your main gains are going to come from working hard to up your pace across the swim-bike-run. You can easily save yourself a few seconds – or even a few minutes – by nailing your transitions. Improving your transitions is an easy win in the quest for a new personal best time.
Get your wetsuit off faster – Lube up, and multi task
Almost every triathlete will, at one stage or another, have experienced the ‘time standing still’ sensation of getting stuck in their wetsuit and wasting vital time rolling around in T1 trying to free their limbs from the neoprene prison.
Fast wetsuit removal starts before you’ve even put yours on! Use wetsuit lube / anti chafe lotion and put it on your elbows, knees, wrists and ankles. It’ll help the suit to slide off far easier.
Become a multitasking master. Use the run between the swim exit and getting to your transition zone to start the process of removing your wetsuit. Leave your swimming cap on and just move your goggles up on to your forehead to keep your hands free. Remove your wetsuit down to your waist as you run, using fast and fluid movements to get your arms out of your sleeves.
Once you get to your bike (or the change tent) pull the wetsuit down at the waist and then use a kicking motion to get your legs out, fast.
Wear a tri suit
If you haven’t been wearing one already – treat yourself to a tri suit. You’ll save so much time in transition because you won’t have to get changed. The added bonus is that tri suits these days are also getting increasingly high tech, packed with features to enhance aero dynamics so you can ride faster on the bike. And cooling features to help you perform better on the run!
Leave your cycling shoes clipped into your pedals
For those who are more advanced triathletes/cyclists, you can save time in transition by not having to run in your cleats. Clip-clopping over bumpy grass or slippery tarmac will slow you down. You’ll see the short course PROs doing a ‘flying mount’ – they run with their bike and almost jump on to the saddle, sliding their feet into their shoes as they go.
But if you don’t fancy the risk of a full flying mount. You can do a ‘push mount’ instead. When you’re setting up your bike in transition, clip your shoes into the pedals, with the left shoe closest to the front of the bike (or at the 9 ‘o clock position). Put rubber bands through the loop on the back of your triathlon cycling shoes (most triathlon-specific bike shoes have this) and hook the band on to your rear mech/bottle cage holder to hold the shoes in place. Don’t worry, the bands will snap as soon as you start pedalling.
When you take your bike out of the rack in T1, run on the left hand side of it. After the mount line, grab your handlebars with both hands (in a riding position) and put your left foot on top of the left shoe. Push down and put your weight on to the left shoe – this will give the bike forward momentum – while swinging your right leg over the back of the bike as it rolls forward. Put your right foot on top of the right shoe and pedal with your feet on top of the shoes for a few strokes. Once you have a clear section of road ahead of you, you can reach down to get your feet into your shoes and do the straps up.
Towards the end of the bike ride, about 500m before you need to dismount, reach down, undo your shoes and take your feet out of the shoes so you’re pedalling with your feet on top of them. As you get close to the dismount line, put your weight onto your left foot and swing your right leg over the back of the bike so you’re coasting while standing on one pedal. Pull the brakes gently to bring your speed right down, and simply step off the bike with your right foot before the dismount line.
Practice plenty of times at home (a very slight downhill is good so the bike has momentum) to build up your confidence before you try this in a race scenario.
Use elastic laces for your running shoes
It might only take a few seconds, but time spent tying your shoe laces in T2 is time you could be putting to better use hurtling towards the transition exit ready to tear up the run course. If you’re sat in T2 muttering the ‘bunny ears, bunny ears…” shoe lace rhyme of your formative years. It’s time to embrace elastic laces. As you can guess from the name, elastic laces mean you don’t have to tie your shoes – simply thread the laces through and they’ll give you enough stretch to get your feet into your shoes, but they’ll lock down to keep them secure.
Refill your nutrition supplies on the move
This is probably most applicable to long distance triathlon racing, where saving a few seconds in transition might not be such a priority. But if you’re chasing podium places, World Championship slots – or just a new best time. Every second counts.
It’s unlikely you’ll be able to carry (or want to carry) all the gels and nutrition you need for the entire 112 mile bike ride and the marathon run all at once. So you’ll probably need to keep your run nutrition in your T2 transition bag, ready to refill your tri suit pockets. But instead of standing in transition while you do so. Instead, put all your gels for the run in a small ZipLoc style bag. You can grab this in T2, and then while you’re running set about putting the gels into your pockets before ditching the bag in a trash zone at the next aid station. Nutrition sorted, time saved!
The more often you race, the less daunting triathlon transitions will feel. Soon all the organisation and logistics involved will become second nature, and you’ll be flying through T1 and T2 stress free. Check out our training section for more tips and insights, or head over to our triathlon race guides to find your next event.
Triathlon apparel, training plans and more
SHOP NOW
>>> Read full article>>>
Copyright for syndicated content belongs to the linked Source : Tri247 – https://www.tri247.com/beginner-triathlon/essential-triathlon-transition-tips-advice-beginners?utm_source=rss&utm_medium=rss&utm_campaign=essential-triathlon-transition-tips-advice-beginners