YOU CAN’T BUILD a strong, proportional body without a balanced approach to your workouts. If your strategy is to do nothing but dumbbell curls, bench presses, and situps so you can flex in the mirror, you’re not going to be successful. Jacked arms, a barrel chest, and a six-pack are solid goals, but a big, strong back should be just as important when you establish your priorities for both aesthetics and function. You’ll get one by directing your focused effort to those muscles on the posterior part of your body, doing the best back exercises to build yourself up to peak shape.
Whether you’re aiming to train your traps, lats, or even your rear delts, including these back exercises into your workouts will be a key component of your overall fitness plan. Some of them are compound movements, which recruit multiple muscle groups and build big-time strength and size gains. Others will effectively isolate their target muscle, allowing you to home in on one spot to maximize growth. You’ll do best with a mix of both, emphasizing balance.
Before you hit the gym and start pulling away at any weight you can put your hands on, take some time to brush up on the best practices of back training.
The Benefits of Training Your Back Muscles
A More Balanced Body
A big chest looks ridiculous (and doesn’t physically function all that well) without a big upper back and shoulders. Likewise, your abs are part of your core, whose role is ultimately to support your spine. For better function and aesthetics, your mid and lower back need attention.
Stronger Back, Better Posture
No one wants to exhibit poor posture when they look at themselves in the mirror—so the postural correction that comes from strong, activated back muscles is important, too.
A Strong Back Helps You to Be Stronger Everywhere
Your back muscles include your traps, lats, delts, rhomboids, erector spinae, and other muscles associated with the posterior chain. Targeting those muscles specifically is important for plenty of reasons—but your back muscles can also play a bigger role than you might expect in assisting big-time compound movements that pay off in spades, like the bench press. Your upper- and mid-back muscles help to stabilize your shoulder joints, and the stronger and more stable your shoulders, the more weight you can lift in just about every upper-body exercise. Your hands have to be involved in back-focused exercises to handle the load, too, so don’t be surprised when all those rows result in bigger arm muscles.
The V-Taper
Are you fixated on your front because you’re yearning for a V-shaped torsos? You’re not going to get there without homing in on the back. If that’s all you’re looking to do, check out this workout—but you should probably be motivated to look beyond just attaining that V.
Now are you ready to turn your attention to your rear more? Get started with some of our favorite exercises to work your entire back.
The Muscles in Your Back
There are lots of muscles in your back, but the major focus of most of the exercises you’ll perform are:
Deltoids (delts)Trapezius (traps)Latissimus Dorsi (lats)Rhomboids Erector spinae
How to Warm Up Before Training Your Back
Make sure that you don’t go into a back workout cold. Proper preparation, from dedicated mobility movements to warmup sets of your heaviest compound lifts, will help you perform to the best of your ability.
Try this four-part warmup series from Bespoke Treatments’ Cameron Yuen, DPT, C.S.C.S., before you train. Remember Yuen’s helpful acronym, RAMP: Raise your body temperature; Activate key muscles and movement patterns; Mobilize your joints; Potentiate your nervous system.
The 4-Part Back Warmup
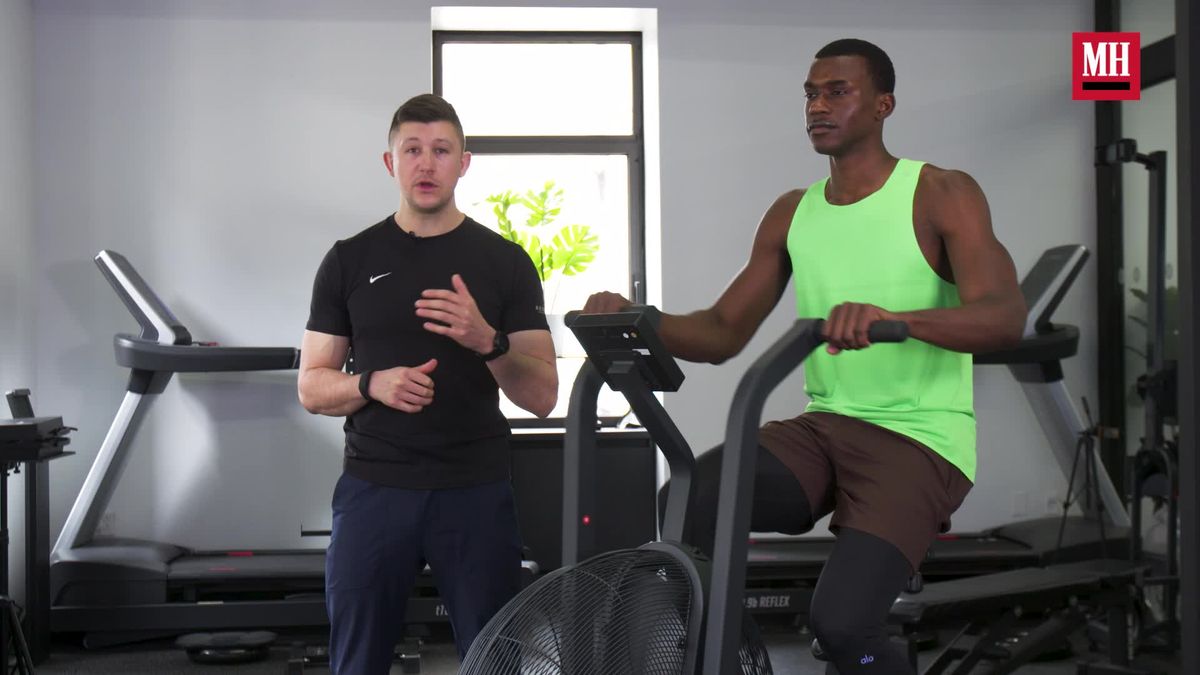
Air Bike
5 to 10 minutes
Resistance Band Pulldown
2 to 3 sets of 5 to 10 reps
Active Hang with Lateral Rock
2 to 3 sets of 5 reps
Overhead Medicine Ball Slam
2 to 3 sets of 3 to 5 reps
The 25 Best Back Exercises
Superman Holds
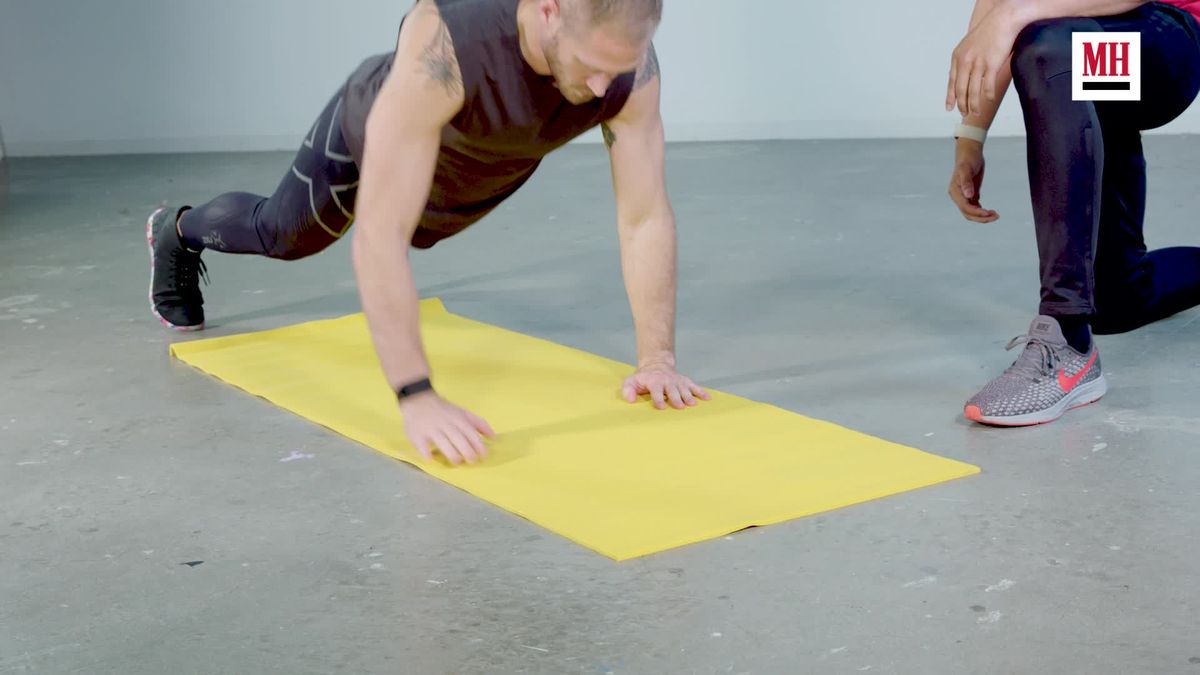
Why: Working your back using just your bodyweight is tough. Short of pullups or inverted rows, you’re pretty much out of luck—aside from this heroic exercise that torches your mid and upper back muscles. The simple movement can be more difficult than you might expect, so make sure you go slow and know what you’re doing before you get down on the floor to fly.
DO THIS:
●Get on the floor on your belly. Squeeze your glutes to raise your feet and legs, engage your mid back, and squeeze your shoulder blades to raise your arms off the floor in an extended position.
●Focus on firing your entire posterior chain to begin the movement—your lower back shouldn’t take all the strain.
●Keep your neck in a neutral position and avoid looking up.
●Hold the top position for a two count before lowering back to the ground. Make sure to move at a measured pace through a set.
Reps: Perform 3 rounds for time (30 seconds) or reps (10 to 15)
Cat-Cow
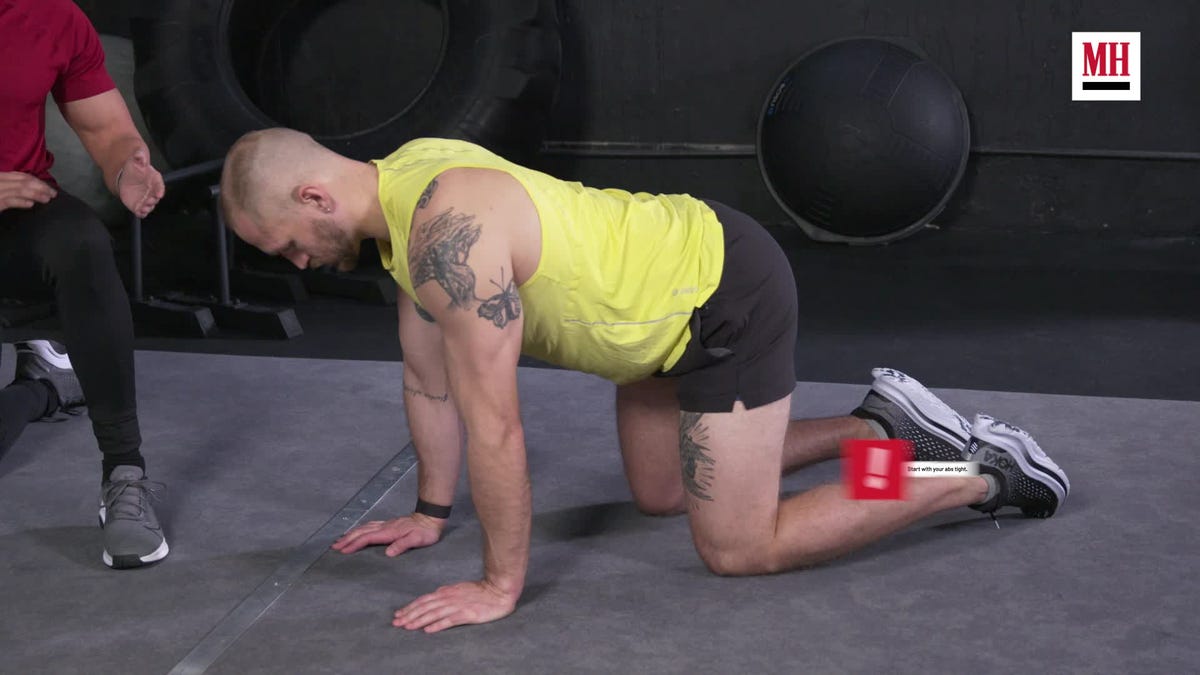
Why: You’re not building your back with this yoga staple, but it is an important exercise to help you prep for the rest of your workout. The goal here is to take your spine to the extremes of flexion and extension. Even if you’re not going to use it as a warmup, you can help to improve your posture and move better by adding it to your daily routine.
DO THIS:
●Get into a quadruped position (on your hands and knees). Stack your hands directly beneath your shoulders and your knees slightly wider than hips (in line with your hands).
●Round your back as much as possible, spreading your shoulder blades and bending your neck down to flex your spine.
●Slowly arch your back, squeezing your shoulder blades and looking up to create spinal extension.
●Repeat the process between the two extremes, moving deliberately.
Reps: 3 to 4 sets of 40 seconds on, 20 seconds off
Half-Kneeling Archer Row

Why: This warmup exercise is great for your shoulders, but there’s plenty of payoff for your rear delts and rhomboids, too. Use this as an opener for back day workouts to get ready for your heavier lifts.
DO THIS:
●Start in a half-kneeling position your left knee on the ground, holding the ends of the resistance band in each hand.
●Raise your right arm up slightly above shoulder level in the same plane as your torso. Keep your thumb pointing toward the ceiling. Maintain your grip on the band with your left hand, too, holding at roughly even with your right elbow.
●Fire your rhomboids (back) and rotator cuff muscles to pull the resistance band straight back across your chest, like shooting a bow and arrow.
●Keep the elbow of your pulling arm close to the body the whole way; make sure your stable arm stays completely straight.
Sets: 3 sets of 12 to 15 reps
Band Bent-Over Row
Men’s Health
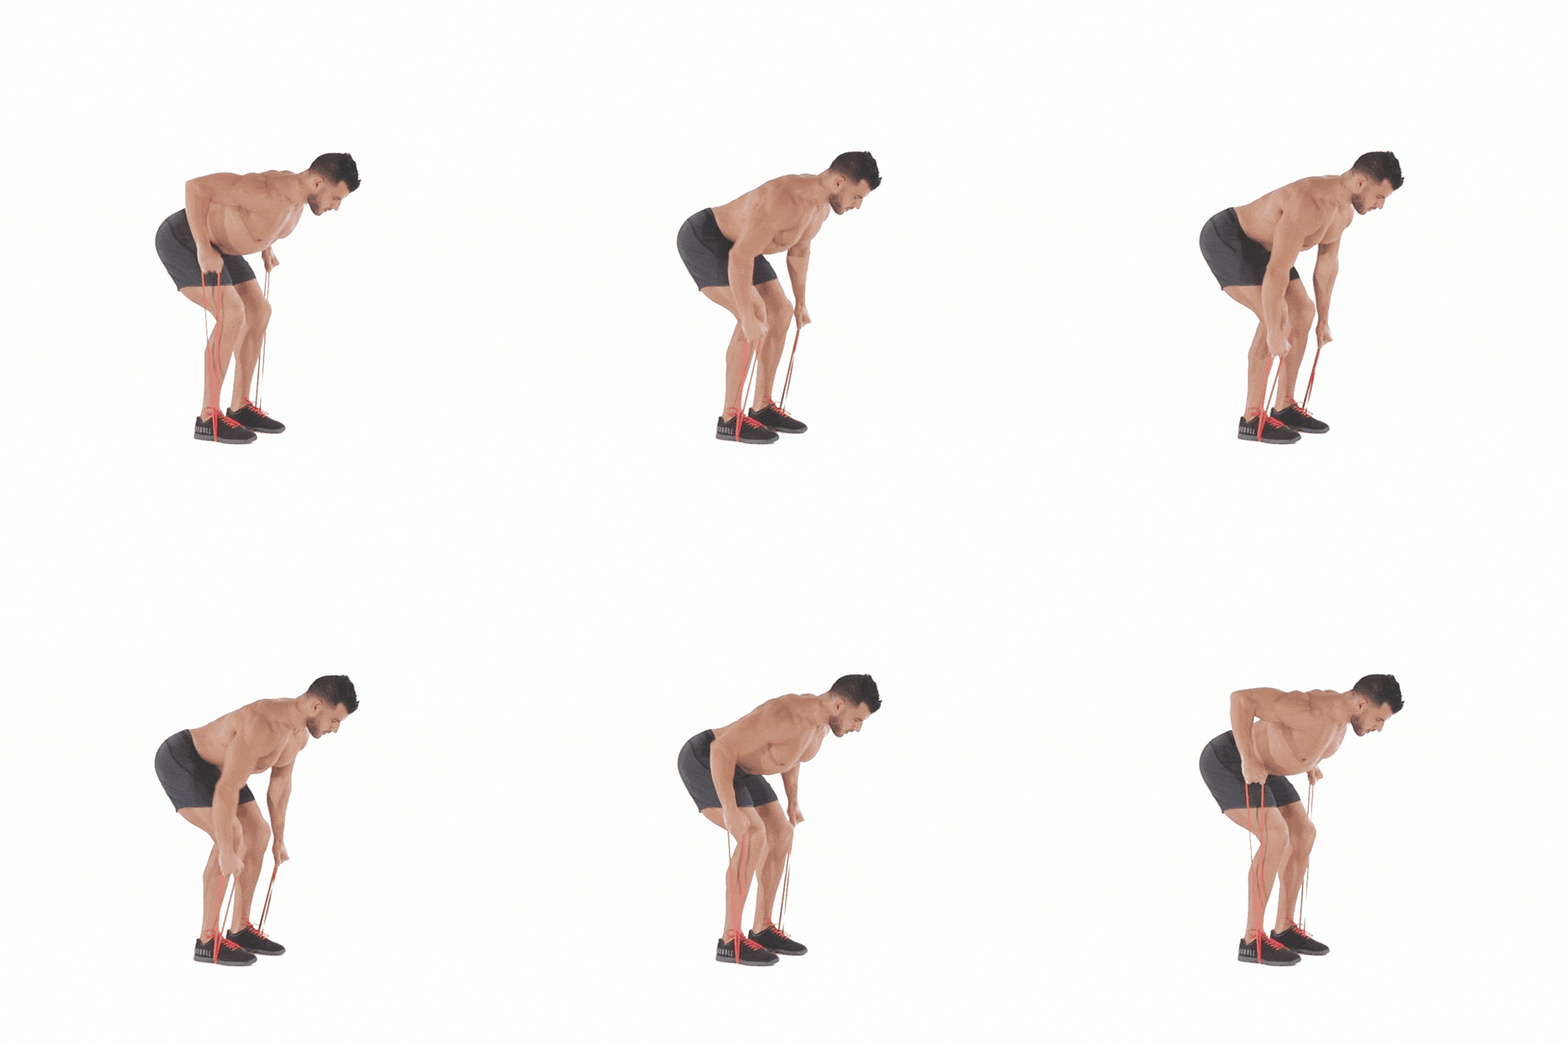
Why: You’ll get used to the row in its many forms if you’re working on your back—so start out with a light-resistance version that can serve as a warmup or a key part of your routine. The band will allow you to work through the range of motion without breaking out the weights, while still challenging you with some resistance.
DO THIS:
●Grab a low-resistance band and set it out on the ground.
●Stand on the middle of the band, grabbing the two ends in either hand with a pronated (overhand) grip, hinging at the hips and slightly bending your knees in an athletic stance. Make sure that your back isn’t rounded.
●Squeeze your back to pull the band ends simultaneously to your chest, or as close as the band allows.
●Pause for a moment at the top of the motion, then slowly return to the original position, working against the band’s resistance.
Reps: 3 to 4 sets of 12 to 15 reps
Renegade Row
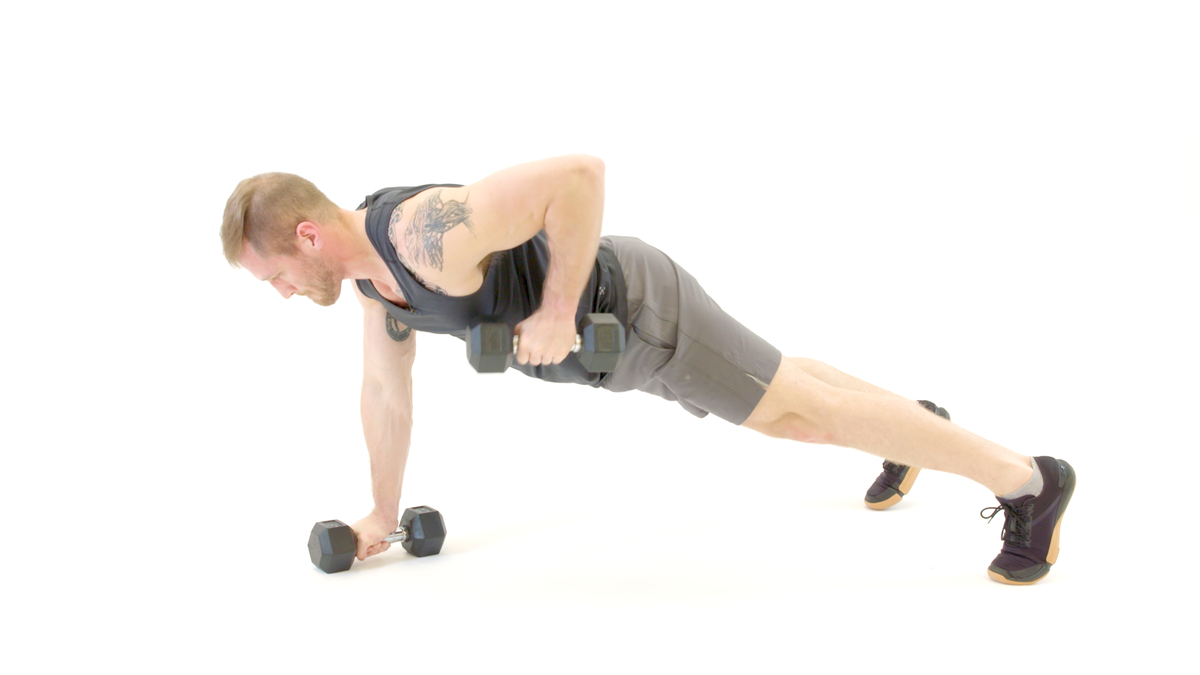
Why: The renegade row is all about maximizing the utility of a position to the highest degree. Take two high bang-for-your-buck moves, like the plank and pushup, and make them even useful by adding more elements to work different muscle groups. Work with light dumbbells here — maintaining the proper spinal position is just as important and rowing the weight.
DO THIS:
●Grab a pair of light dumbbells and about as much space as you would need to perform pushups.
●Get in a plank position with your feet spread wide, gripping the dumbbells with your palms facing parallel to each other. Squeeze your glutes and core to maintain a strong spinal alignment, looking at the floor ahead of you.
●Use your lats to row one of the dumbbells to chest height, then return the weight to the ground, keeping the rest of your body balanced in its position.
●Control the load up and down the movement—if you have to contort your body and shift your back to lift the dumbbells, drop down to a lower weight.
●Perform a pushup, maintaining spinal alignment, and repeat the motion with the opposite arm.
Reps: 2 to 3 sets of 6 to 8 reps per side
Dumbbell Single-Arm Row
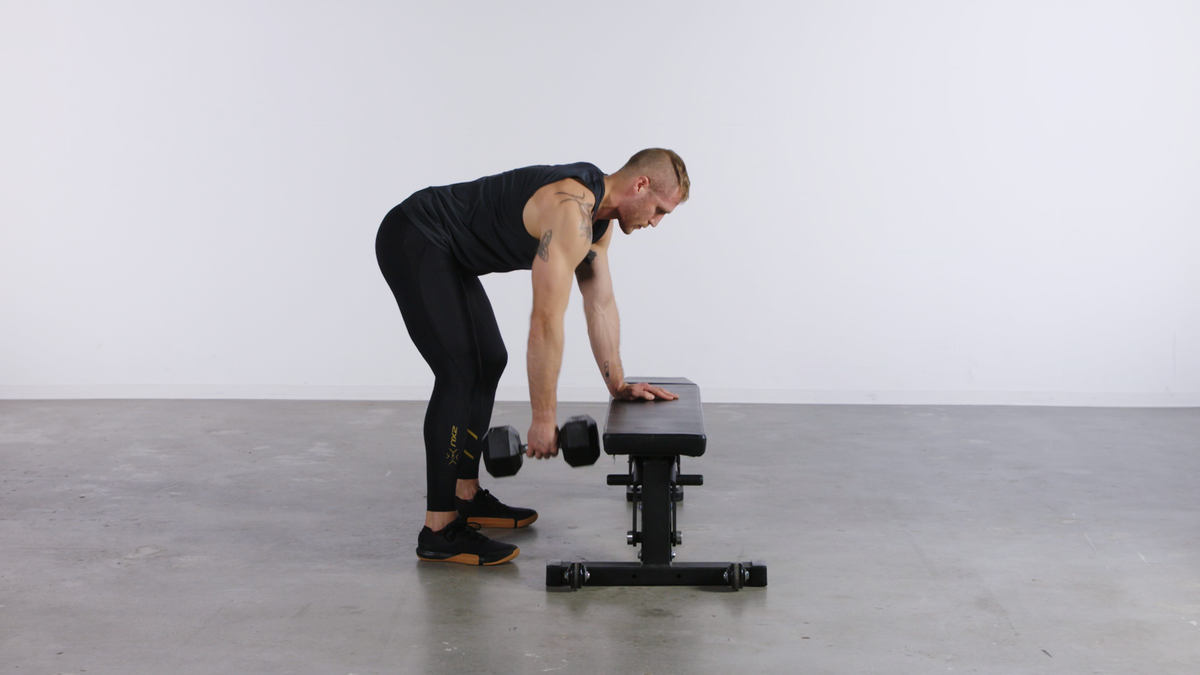
Why: Dumbbell rows are a classic move that should have a place in every self-respecting lifter’s heart. Your hinged position will give your lats a chance to shine, while other rear-positioned muscles like the rhomboids and traps will kick in for support.
You also have the benefit of working both sides of your body, allowing you to work through weak spots by focusing on building up strength imbalances.
DO THIS:
●You only need one dumbbell to do the job here. Old school heads would require you to mount the bench with your weight on your opposite knee and hand, planting the same side leg on the ground—but if you don’t know exactly what you’re doing and have full control of the weight, you could be putting your spine in jeopardy.
●Instead, stand close to the bench, square your feet, and plant your palm on the platform. Bend at the hips, and keep your back straight, picking up the dumbbell with your work hand and allowing it to hang straight down from your shoulder.
●Pull the dumbbell up to the side of your torso without rotating your shoulders or losing your balance. Pause for a count at the top before lowering the weight to the starting position.
Reps: Start with 3 sets of 8 to 12 reps per side, dropping the reps as you add load
Chest-Supported Dumbbell Row
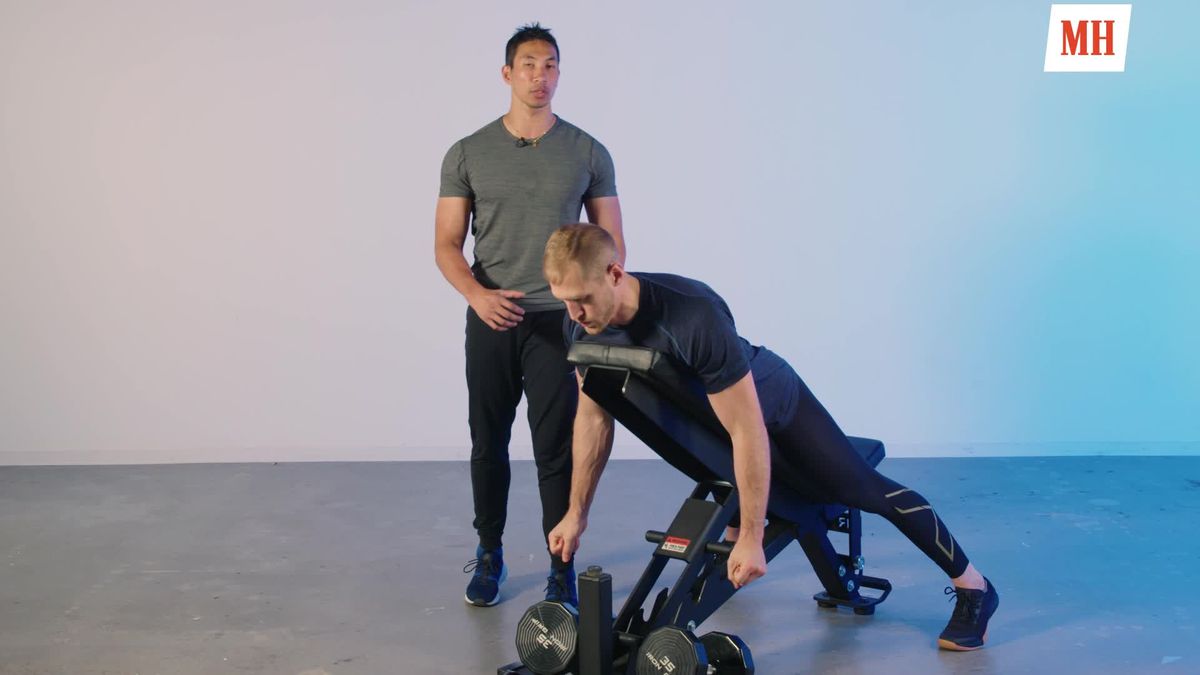
Why: If you struggle with keeping your chest strong and your spine straight when you try bent-over exercise variations, you’ll love this move. The chest-supported row isolates your back and lets a bench do the work, allowing you to concentrate on moving the weight more efficiently.
DO THIS:
●Sit on an incline bench with your chest forward, resting on the support.
●Grab dumbbells with a neutral grip, keeping your chest strong and allowing your arms to hang.
●Squeeze your back to pull the weights to your hips, with your elbows bent at 90-degree angles.
●Squeeze your shoulder blades for one to two seconds maintaining your position, then return to the starting point.
Reps: 3 sets of 8 to 10 reps; lower reps with higher weights/slower tempo
Reeves Incline Row
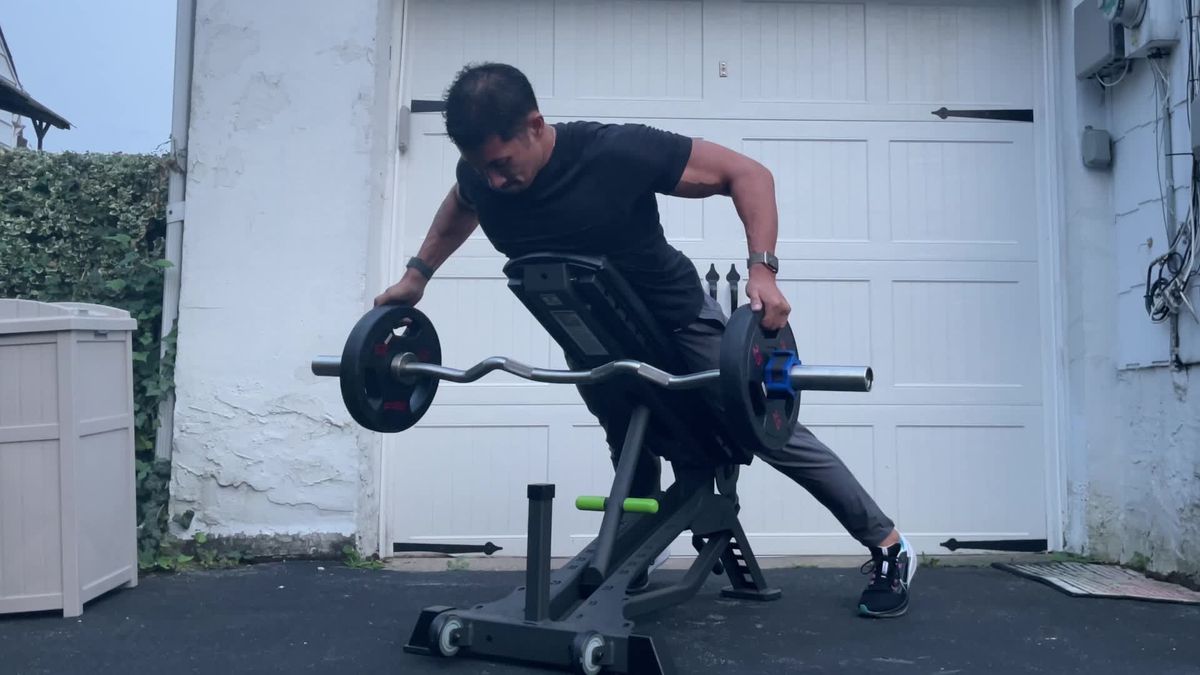
Why: Go back to the bench for this chest-supported row variation—but swap out your dumbbells for short barbell of EZ bar. Created by legendary bodybuilder Steve Reeves, the exercise can be key to building that V-taper shape.
DO THIS:
●Start with your chest on an incline bench, a loaded EZ curl bar (or barbell) beneath the bench.
●Grasp the bar by the plates. Lift it from the ground. Tighten your shoulder blades.
●Row the bar up, touching the it to the bench, pausing, then lowering it.
Reps: 3 to 4 sets of 8 to 10 reps
Inverted Row
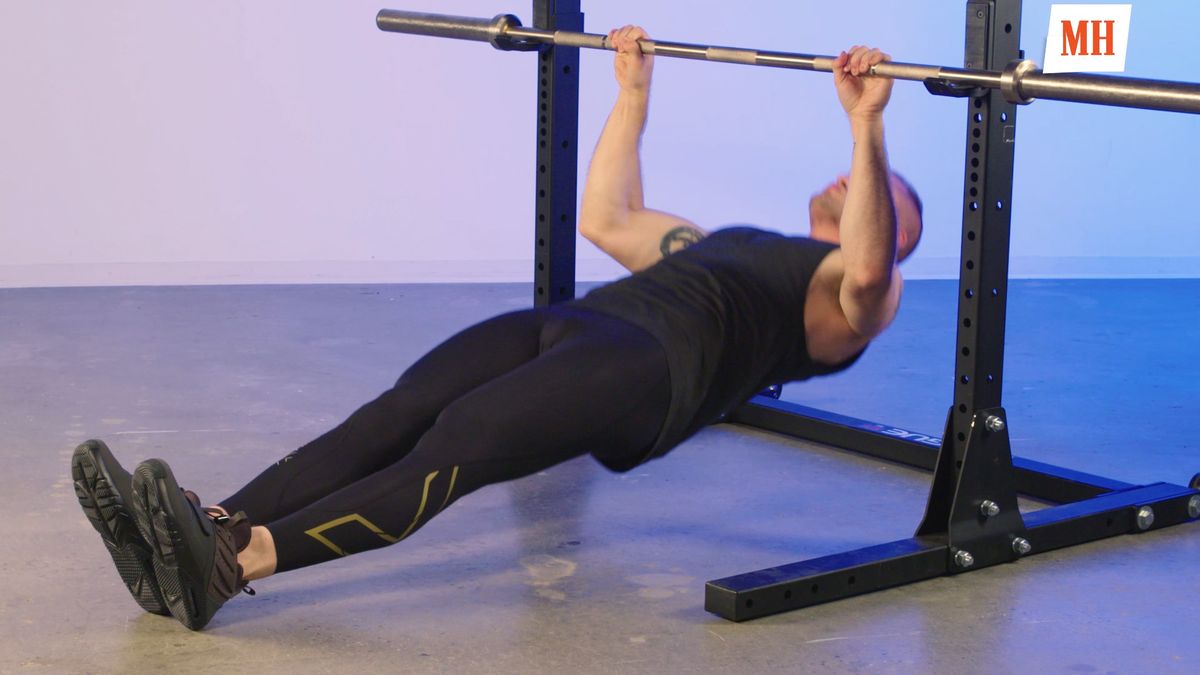
Why: You might look at the inverted row and think it’s just an easier version of movements you’re already doing. It’s just like a pullup with built-in assistance from the ground, right?
Wrong. If you’ve never tried the inverted row before, you’re in for a surprise. The move is a killer upper back driller that will tire you out sooner than you’d expect from its basic setup.
DO THIS:
●Place a bar at about hip height on a Smith machine or power rack.
●Lower yourself to the ground underneath the bar, grabbing it with an overhand grip with your hands positioned directly above your shoulders. There should be some space beneath your back and the ground to hang suspended.
●You can fully extend your legs and rest your heels on the ground for a challenge, or bend your knees and plant your feet on the ground for an easier rep.
●Pull your shoulder blades back to start the rep, then pull up with your arms to lift your chest to the bar.
●Keep your wrists stable and maintain a straight line in your spine, squeezing your glutes. Touch your chest to the bar before straightening your arms to return to the starting position.
Reps: 3 sets of 8 to 10 reps
Elevated Plank Row
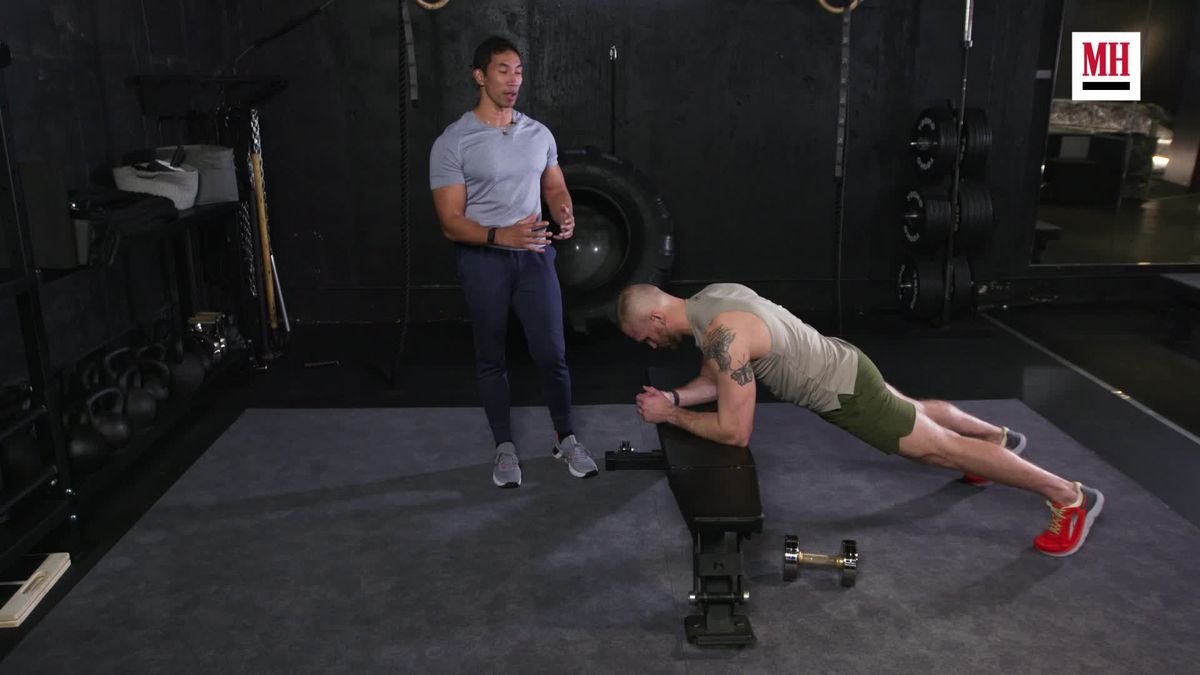
Why: The name of the game for this row is core control. You’re combining an extra-tough plank variation with the anti-rotational challenge of an offset row, giving your abs and your back a challenge.
You can perform the exercise with a normal rowing cadence, or take on the particular challenge posed by MH fitness director Ebenezer Samuel, C.S.C.S., in the above video, complete with some tough isometric holds.
DO THIS:
●Set up in plank position, feet slightly apart, your left elbow on a bench. Your upper arm should be at a right angle with your torso. Tighten your core. Hold a dumbbell in your right hand. Focus on keeping your hips and shoulders square.
●Lift the dumbbell with your arm, rowing it toward your lower chest. Squeeze your back and brace your core to keep yourself stable, then lower the weight down to the starting position.
Reps: 3 sets of 10 to 12 reps
Dumbbell Pullover
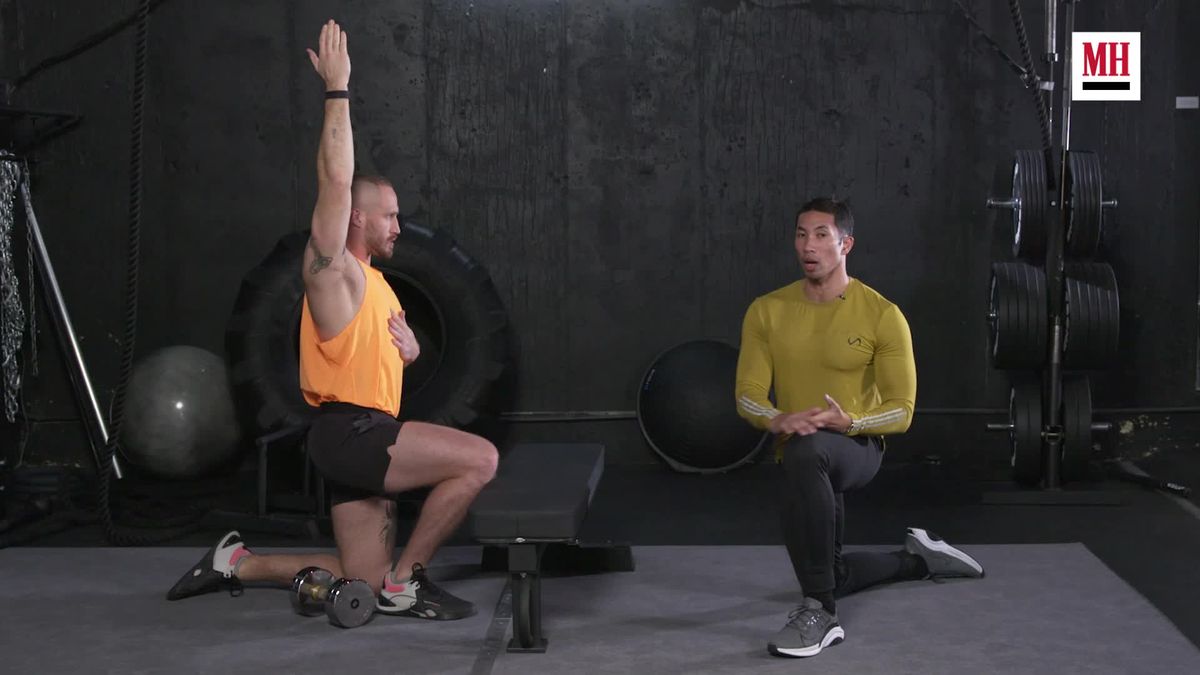
Why: This old-school bodybuilding move trains your core, chest, and shoulders, but your lats are the focus for our back-centric list. You’ll need a solid bench and a heavy dumbbell. Importantly, make sure that you’re able to get into a shoulder-safe position and work within a healthy range of motion to prevent injury.
DO THIS:
●Position yourself so that your shoulder blades are resting on the bench and your shins are perpendicular to the ground with a 90 degree knee angel. Squeeze your glutes and core to keep your ribcage down.
●Raise the dumbbell over your torso, gripping the weight at one end with both hands. Drive your shoulders down into the bench and turn the pits of your elbows forward to engage your lats.
●Maintain tension and lower the dumbbell backwards, driving your elbows up to the ceiling. Don’t go deeper than your shoulder mobility allows. Once you’ve hit the bottom of the movement, pull the weight back up to the starting position.
Reps: 3 to 4 sets of 8 to 10 reps
Single-Arm Eccentric Pulldown
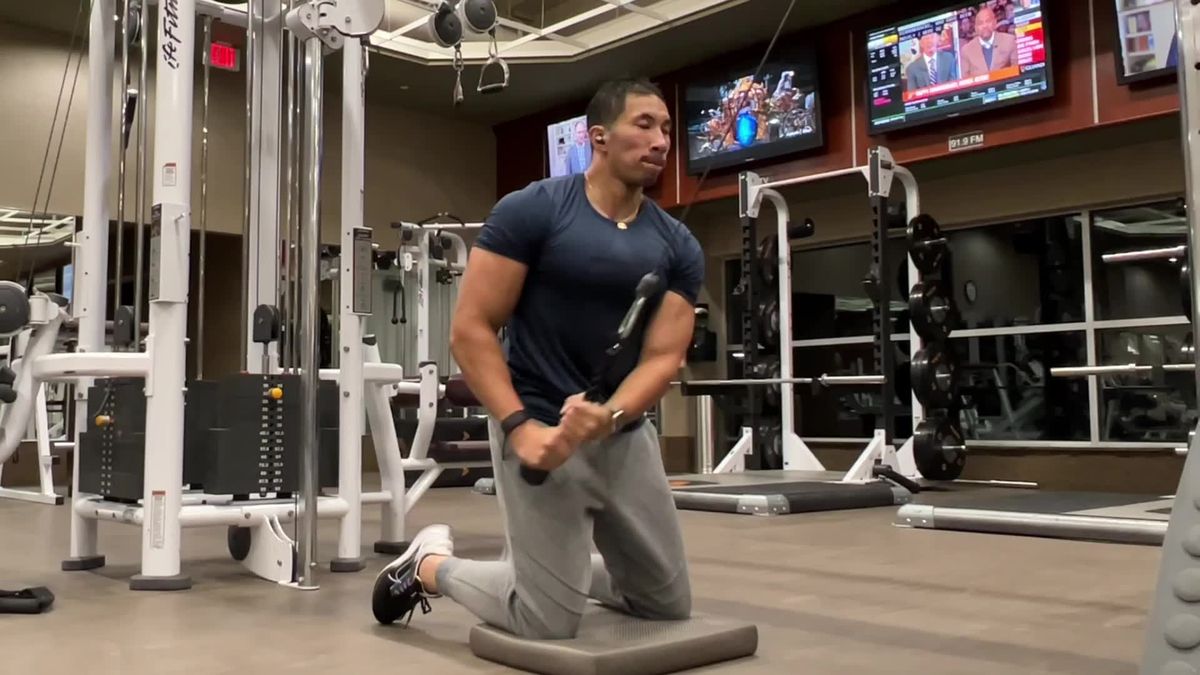
Why: This lat-focused finishing move challenges your back differently than most of the other exercises listed here. Instead of focusing on the pull, a concentric movement, you’re going to emphasize the second part of the movement, the eccentric portion, when you lower the weight. You’ll need a cable machine for this one.
DO THIS:
●Set a cable machine high pulley to a relatively high position, then kneel about 3 feet from it. Grasp a rope or the cable itself with your left arm. Keep your hips and shoulders square to the front and squeeze your shoulder blades and abs (don’t arch your back). This is the start. Make sure you’re using a very heavy weight, heavier than you’d normally do for single-arm pulldowns.
●Place your right arm on the rope too, and pull the weight down with both arms to your left side. Tighten your glutes and abs in this position and squeeze your shoulder blades.
●Keeping your hips and shoulders square to the front, release your right arm (put it out to your side for balance and stability), and slowly raise the weight back to its starting point. Aim to take 3 to 5 seconds to do this (the slower the better). Keep a slight bend in your elbow the entire time.
Reps: 3 sets of 6 to 8 reps per side
TRX Reach and Row
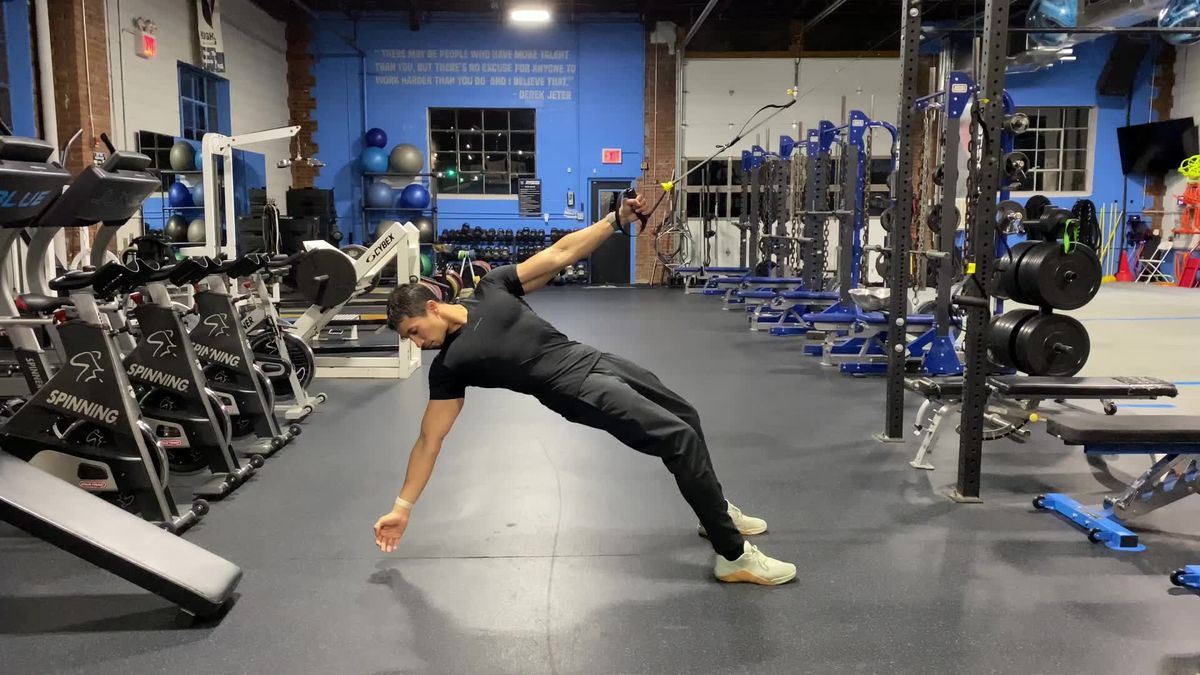
Why: TRX straps can be such a valuable training tool because they allow you to work with your bodyweight in all sorts of ways you’ve never tried before—case in point, this tough pulling exercise. You’ll get a tough core challenge, too.
DO THIS:
●Set up with your feet about shoulder-width apart, glutes and abs squeezed, knees bent slightly, left hand grasping the TRX handle tightly. Rotate your torso open to one side, reaching your right arm toward the ground, keeping core and glutes tight as you do this.
●Using your left arm and back muscles, pull your body toward the TRX, rotating your torso upwards and reaching your right arm as high on the TRX as you can.
●Relax and return to the start position, this time keeping your abs tight so hips and shoulders stay square to the ceiling.
●Your right arm should be pointed directly above you. Pause here, then, keeping your hips and shoulders square, row upwards again with your left arm. Pause for 1 second.
●Return to the second start position, then extend your right arm out to the side as far as possible. Battle to keep hips and shoulders square.
●Row up again, pausing for 1 second. Return to the start.
Reps: 3 sets of 8 reps per side
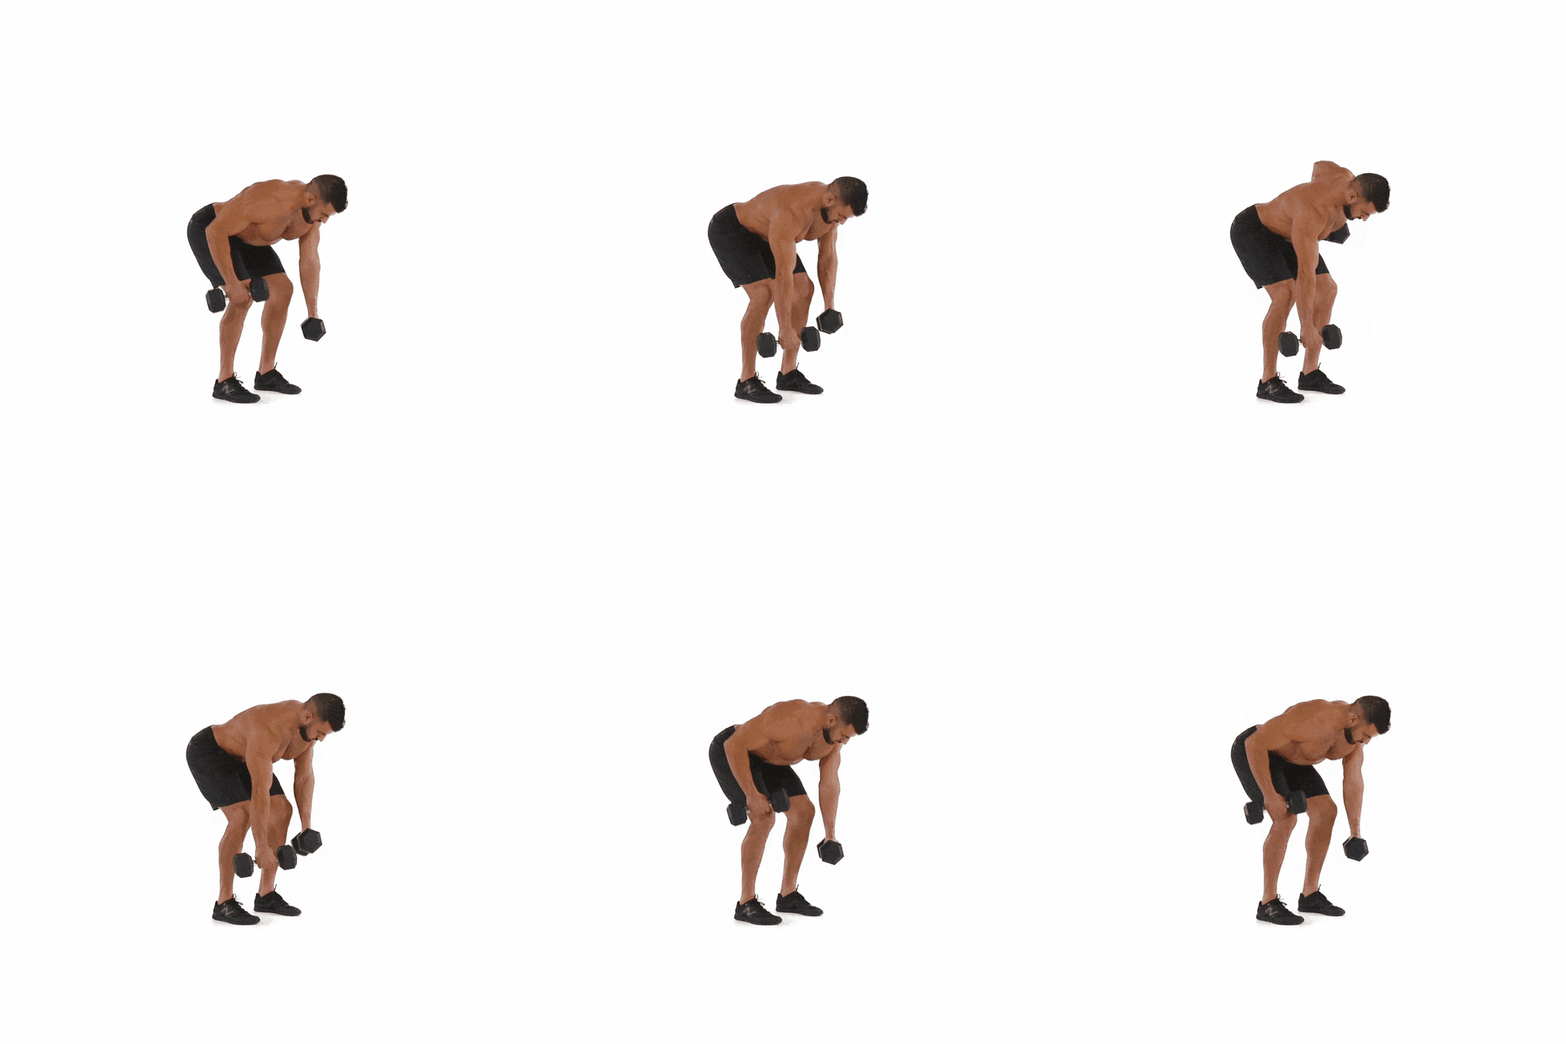
Bent-Over Dumbbell Alternating Row
Men’s Health
Why: Work on each side of your body individually without using a bench for support. You shouldn’t be focused on pulling big weight here, especially with your back in the bent position, so err to the lighter side, especially if you’re just starting out.
DO THIS:
●Grab a pair of dumbbells, hinge at your hips and knees, and lower your torso until it’s almost parallel to the floor. Your feet should be shoulder-width apart, and your lower back should be naturally arched; just make sure to avoid rounding your lower back.
●Let the dumbbells hang at arm’s length from your shoulders with your palms facing each other.
●Keeping your position, lift one dumbbell to your side, pause at the top of the movement, and slowly lower it. Then repeat with your other arm.
Reps: 3 sets of 8 to 10 reps per arm
Towel Grip Dumbbell Row
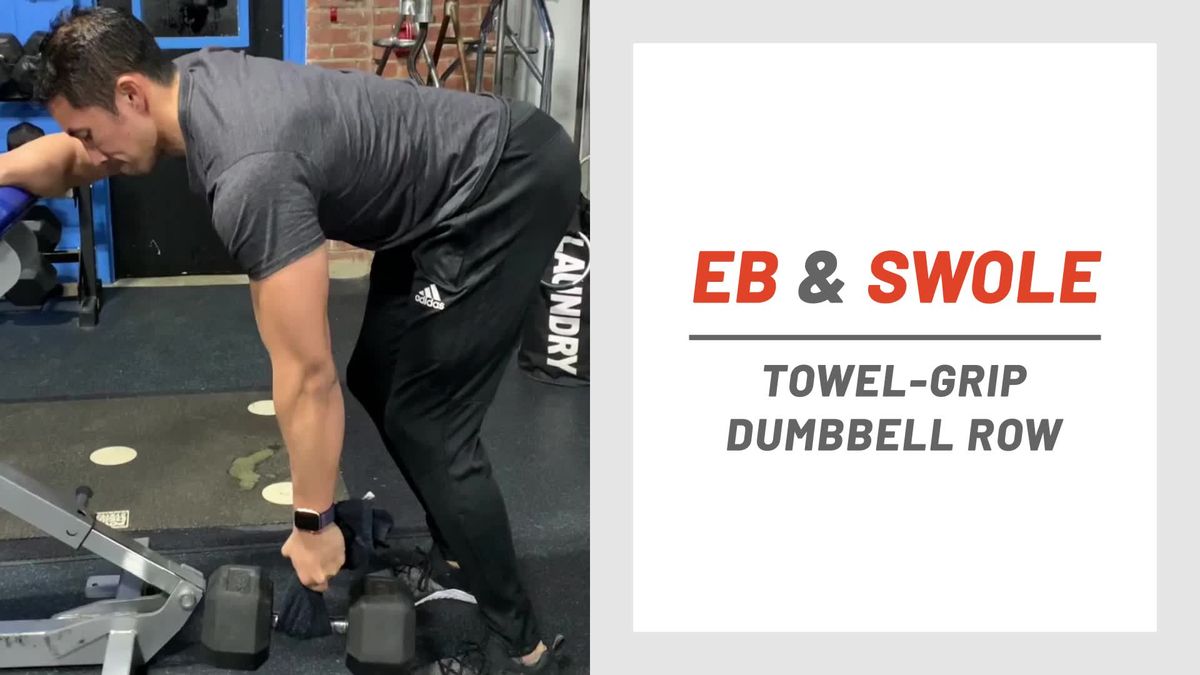
Why: This dumbbell row variation provides an extra grip strength challenge and bolsters your stability to boot. All you need is a small towel.
DO THIS:
●Wrap the towel around the handle of the dumbbell, then hold the two ends tightly in an overhand grip.
●Position yourself to row, hinged at the waist with your free arm leaning against the top of the bench.
●Squeeze your back to row the dumbbell straight up, keeping a tight grip on the towel to keep the weight parallel to the ground. Avoid recruiting your shoulder or shifting your position to get the load up; if you need to do so drop down to a lighter dumbbell. Control the weight back down, maintaining your position.
Reps: 3 sets of 8 to 10 reps per arm
Towel Grip Landmine Row
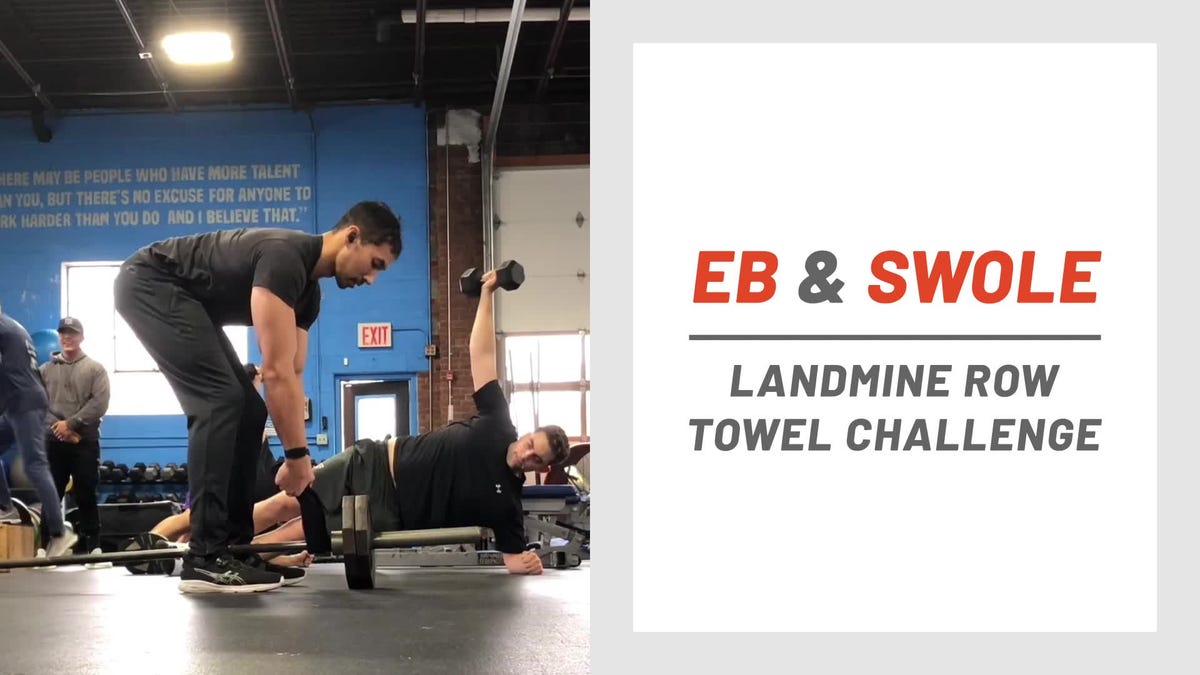
Why: Keep the forearm and back gains coming by shifting your towel grip over to the landmine attachment. The barbell tool allows you to move the implement around from the ground, putting it in a perfect position for pulls to target the mid-back.
DO THIS:
●Set up a barbell landmine and load a weight that you can row for multiple reps.
●Stand straddling the bar in an athletic stance, then wrap the towel around the bar and hold it with an overhand grip tightly in both hands.
●Squeeze your back muscles to row the weight up to your chest explosively.
Reps: 3 to 4 sets of 8 to 10 reps
Bear Row to Gorilla Row
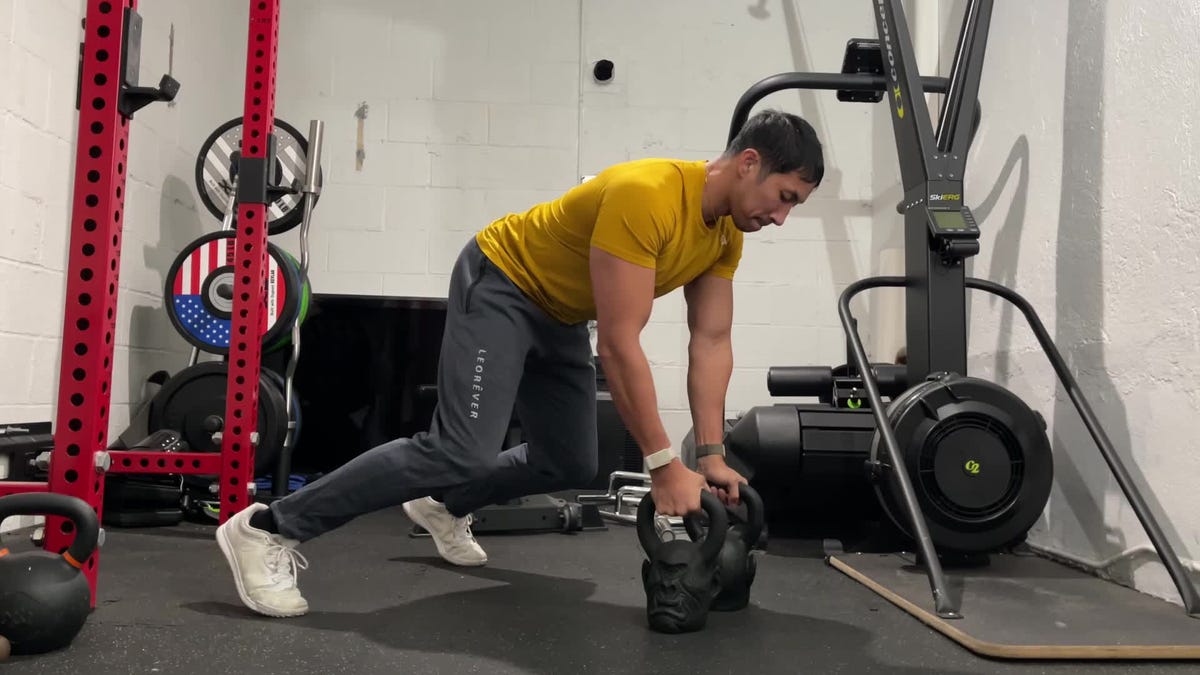
Why: This animalistic compound exercise gives you two back-building rows in one—along with a chance to crush your core and hone your agility to a surprising degree, too. Your best bet is to use kettlebells, given the position of their handles, but dumbbells will work in a pinch.
When you do the bear row, you’re in a position that challenges your core and forces you to fight to stabilize to keep your hips square. As you shift to gorilla, you get an extra test of your coordination and athleticism along with the back blast.
DO THIS:
● Start in bear plank position, hands on kettlebells set close to each other, abs and glutes tight. Tighten your abs.
●Row one kettlebell upwards. Pause at the top, keeping your hips square to the ground. Lower and repeat on the other side.
●Jump your feet alongside the kettlebells. Tighten your abs.
●Without moving your torso, row both bells up twice. Return the bells to the ground and jump back to bear plank position, tightening your core.
Reps: 3 sets of 40 seconds on, 40 seconds off
Bent-Over Barbell Rows
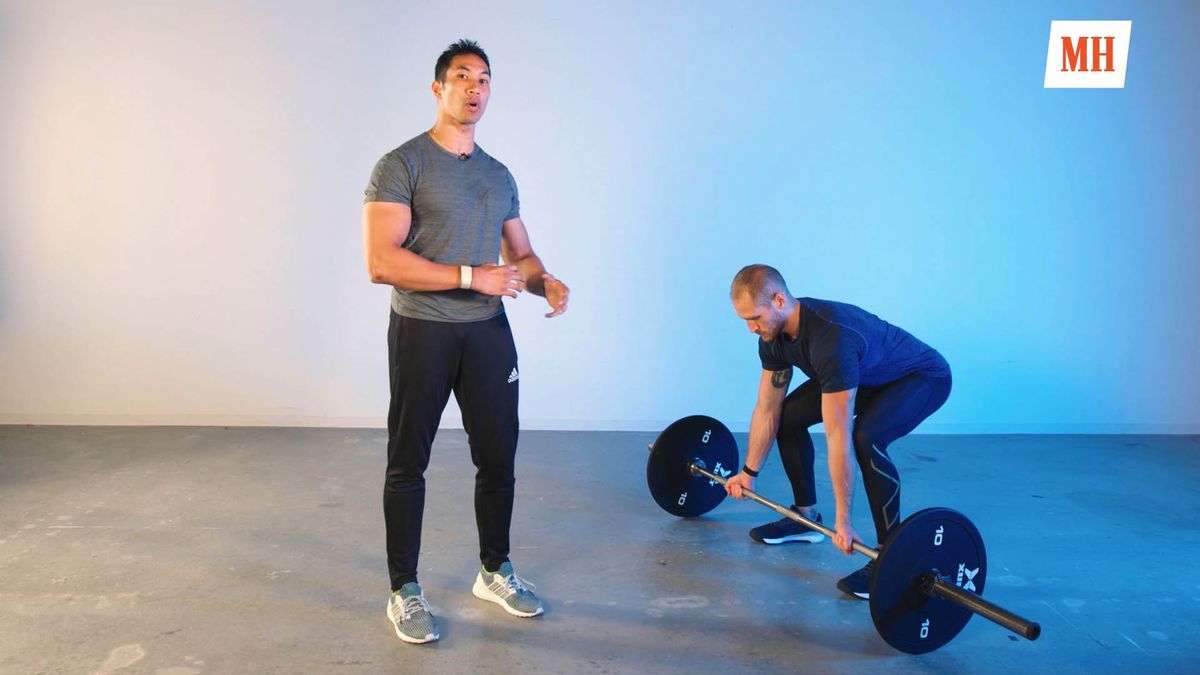
Why: Compared to other variations of the row—like the single-arm dumbbell row—the barbell version allows you to use more weight. Rowing with heavier loads elicits more muscle growth in your middle and lower traps, rhomboid major, rhomboid minor, upper traps, rear deltoids, and rotator cuff muscles.
Use a supinated (underhand) grip to target your rhomboids, the small muscles that start at your spine and attach to your shoulder blades. They assist your traps with pulling your shoulder blades together. These muscles tend to be weak due to the long amount of time we spend sitting at desks, in cars, or on couches every day. You’ll also get a nice biceps pump.
The barbell row is a go-to exercise to work your middle back muscles. Just be careful to use proper form and don’t overload the bar.
DO THIS:
●Grab the barbell with a pronated (overhand grip), holding your hands just further than shoulder width apart.
●Hinge at the hips and knees and lower your torso until it’s almost parallel to the floor. Keep your back naturally arched, and make sure to avoiding rounding.
●Pull the bar to your upper abs and squeeze your shoulder blades toward each other. Pause, then slowly lower the bar back to the starting position.
Reps: Start with 3 to 4 sets of 8 to 10 reps; decrease reps with load
Pendlay Row

Why: This barbell row variation keeps the weight on the ground, giving you the opportunity to bring more explosive movement (and a full pause to rest between each rep) to the exercise.
For some people, the high hinge position might be uncomfortable for their hips. If that’s the case for you, try out the exercise in a sumo stance instead.
DO THIS:
●Step up to a loaded barbell, keeping the barbell close to your shins, standing with feet shoulder-width apart. Tighten your abs, push your butt back, and bend at the waist, lowering until your arms can grasp the bar.
●Squeeze your glutes and make sure your hips are lower than your shoulders. Squeeze your shoulder blades.
●Maintaining this position, explosively row the barbell to the bottom of your ribcage. Lower back to the ground. Reset your body and repeat.
Reps: 3 to 4 sets of 6 to 8 reps
Seated Cable Row with Pause
Men’s Health
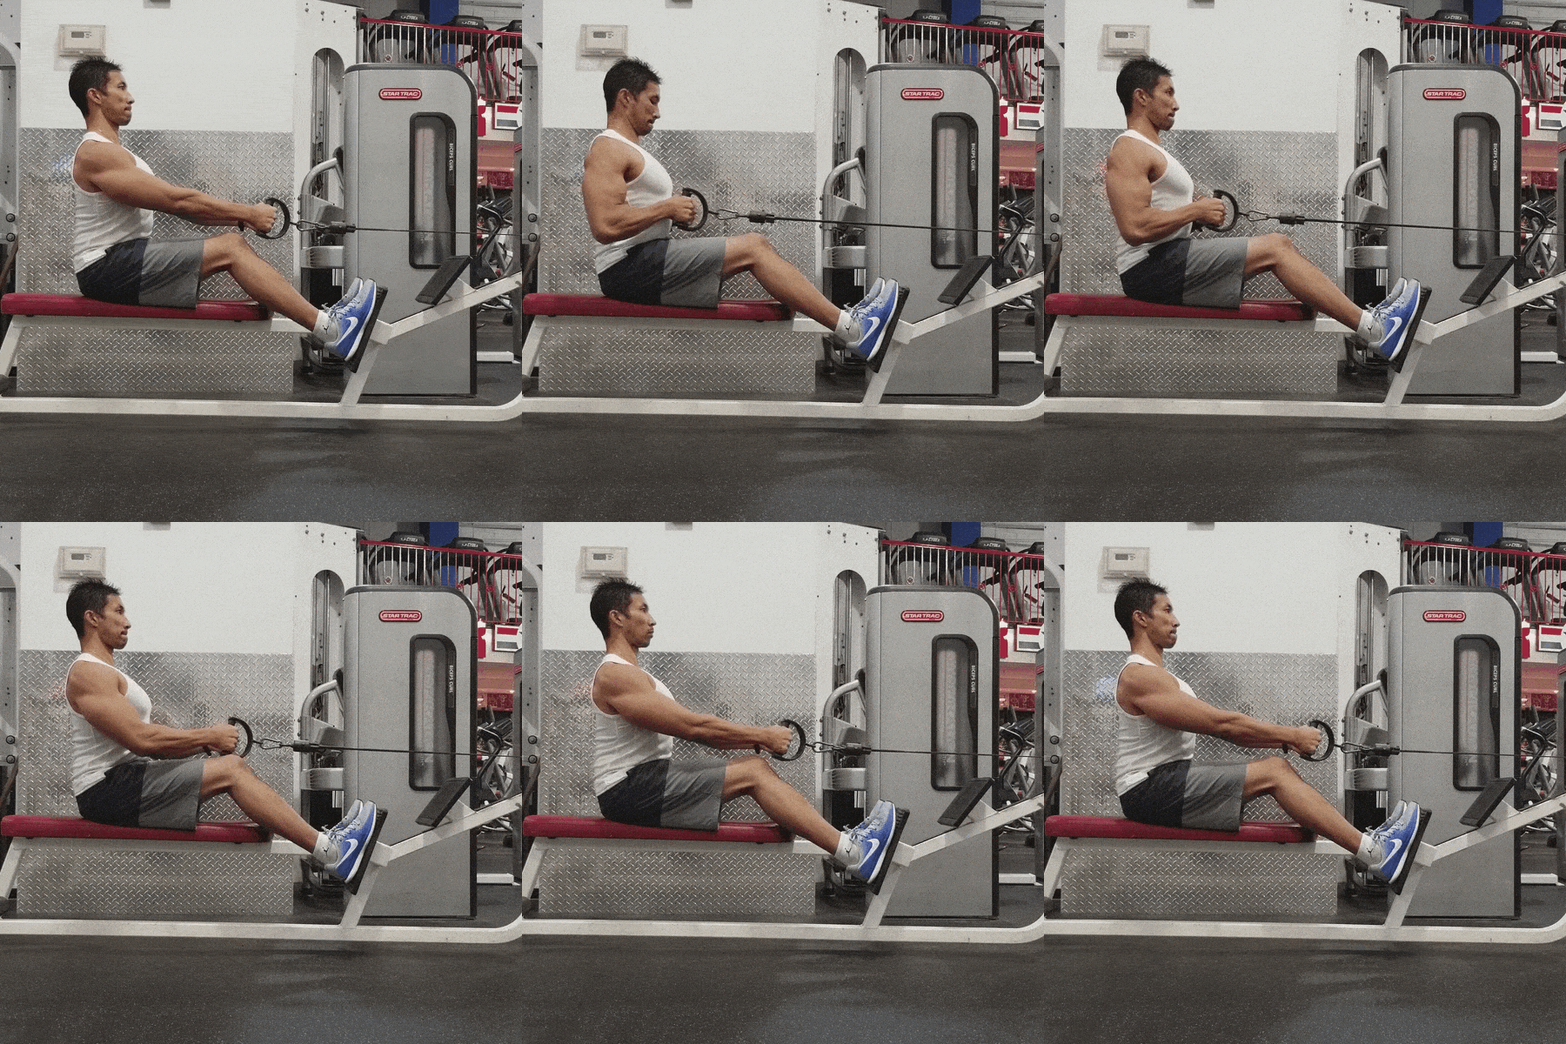
Why: Seated cable rows are a traditional upper-back exercise. Adding a pause for three seconds when the bar gets to your torso, however, can increase your gains. The pause keeps your scapular retractors working longer. Strengthening these muscles is important because a weakness can lead to unstable shoulders—and that limits your strength and muscle gains in nearly every upper-body exercise, including the bench press and arm curl.
When you start this movement, pull your shoulders down and back. Otherwise, you’ll keep your shoulders elevated, which stresses the shoulder joint. Over time, this can cause your joint to become unstable, which often leads to injury.
DO THIS:
●Attach a straight bar to a cable station and position yourself with your feet braced. Grab the bar using an overhand, shoulder-width grip, and sit upright.
●Pull the bar to your upper abs. Pause for three seconds, then slowly lower your body back to the starting position.
●Your torso should remain straight and motionless throughout the movement. Don’t lean forward and backward to perform the exercise.
Reps: 3 to 4 sets of 8 to 12 reps
Pullup or Chinup Variations
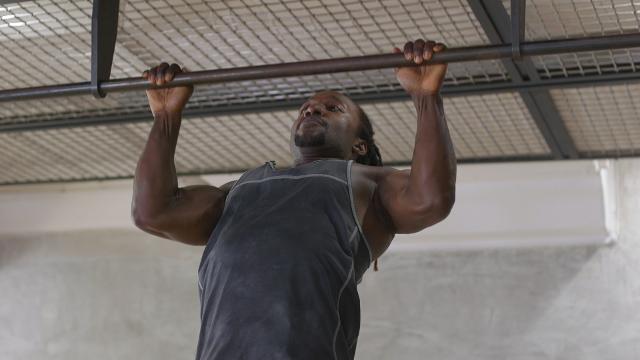
Why: If you want a V-shaped torso, you must do pullups and chinups. They build width because they target your latissimus dorsi (a.k.a. lats), the large back muscles that wrap around the sides of the upper body just below the arms. These muscles are the ones that give the torso a wider, flared shape, and can make you appear slimmer even if you haven’t lost an inch around your middle.
Below is a list of variations of this classic back exercise from easiest to hardest. As you pull your chest to the bar during each rep, think about pulling your shoulder blades toward your back pockets. This will force you to use your upper-back muscles—as opposed to your biceps—to perform the move. Need more help? Follow this guide.
For each rep of this back exercise, you’ll start in a dead hang and then pull your chest to the bar.
CHINUP: Grab the bar with a shoulder-width underhand grip.
NEUTRAL-GRIP PULLUP: Grab the parallel handles of a chinup station so that your palms are facings each other.
MIXED GRIP CHINUP: Placing your hands shoulder-width apart, use an underhand grip with one hand and an overhand grip with the other.
PULLUP: This is the same movement as a chinup except that you grab the bar with an overhand grip that’s slightly wider than shoulder width.
START-AND-STOP PULLUP: Perform a pullup, and then slowly lower halfway down to a dead hang. Pause, then pull your chest to the bar again. Pause, now lower all the way down to a dead hang. That’s 1 rep.
ISO PULLUP: Perform a pullup, but hold your chin above the bar for 10 to 15 seconds. You can do this for several reps or on the last rep of your last set of pullups.
TOWEL PULLUP: Find your hand positions for a chinup, then drape a towel over each of those spots on the bar. Grab the ends of the towels so that your palms are facing each other. Grasping the towels engages more of your forearm muscles, improving your grip strength and endurance.
Reps: Start with 3 sets of 6 to 12 reps
Lat Pulldown
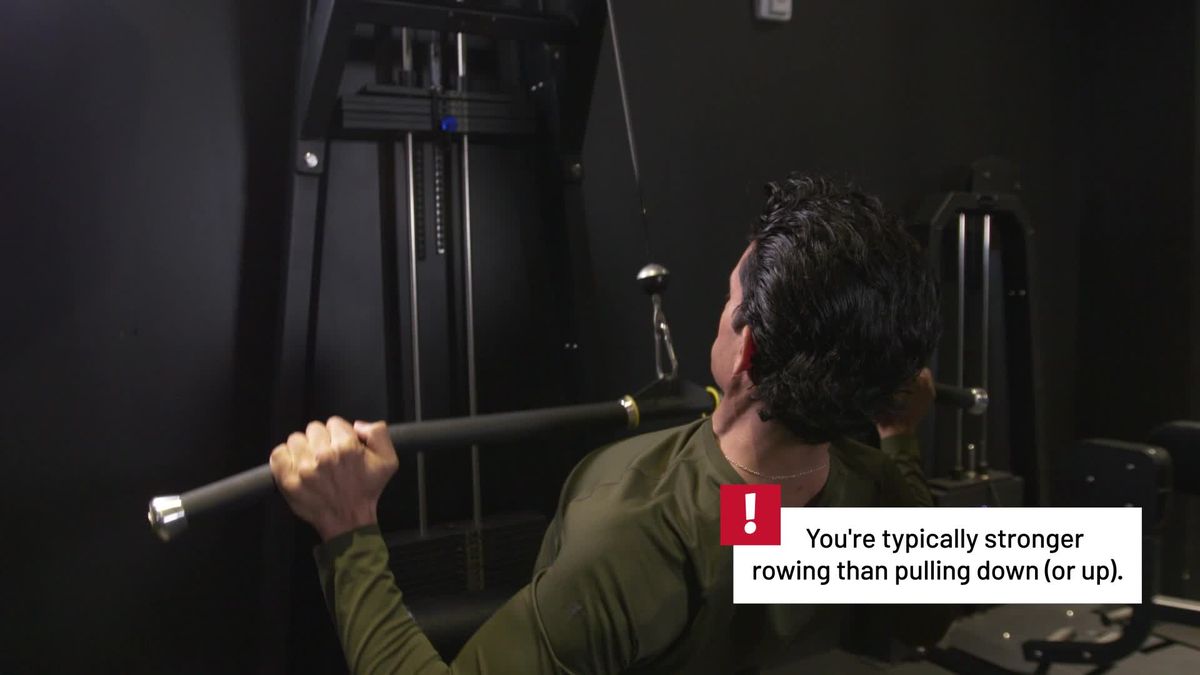
Why: While you can’t beat the chinup as a back exercise, the lat pulldown is also great for increasing muscle. In fact, bodybuilders swear by it. Get the most out of the move by performing the exercise at a slow, controlled tempo. You should “feel” your lats working each rep. Do 8 to 12 reps like this, making sure your upper body remains in nearly the same position from start to finish.
DO THIS:
●Sit down at a lat pulldown station and grab the bar with an overhand grip that’s just beyond shoulder width.
●Without moving your torso, pull your shoulders back and down, and bring the bar down to your chest. Pause, then slowly return to the starting position.
Reps: 3 sets of 8 to 12 reps
Kneeling Lat Pulldown
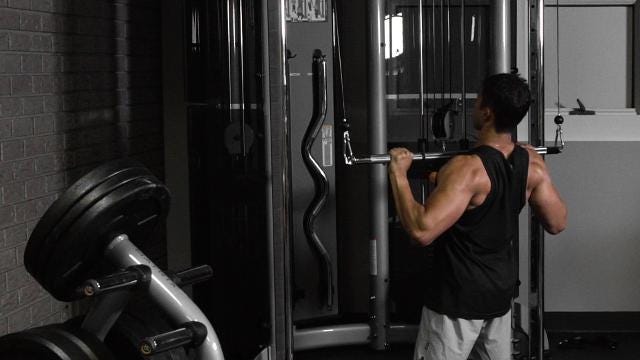
Why: Get more from your lat pulldown by taking it to the floor. You’ll have a different base than the standard pulldown, and you won’t be so tempted (or able) to ride the cable up at the top of each rep without having your knees braced. This is also a great way to master the proper form for other versions of the move.
DO THIS:
●Get down on your knees in front of a cable tower with the proper setup, with the bar’s starting position just about as high as you’re able to reach without raising yourself off the ground.
●Make sure to squeeze your glutes and core throughout the move to keep your position stable. Grip the bar with a pronated (overhand) grip, then use your back muscles to pull the bar down to the top of your chest.
●Pause for a moment, then control the bar as you allow it to return to its starting position.
Reps: 3 sets of 8 to 12 reps
Deadlift
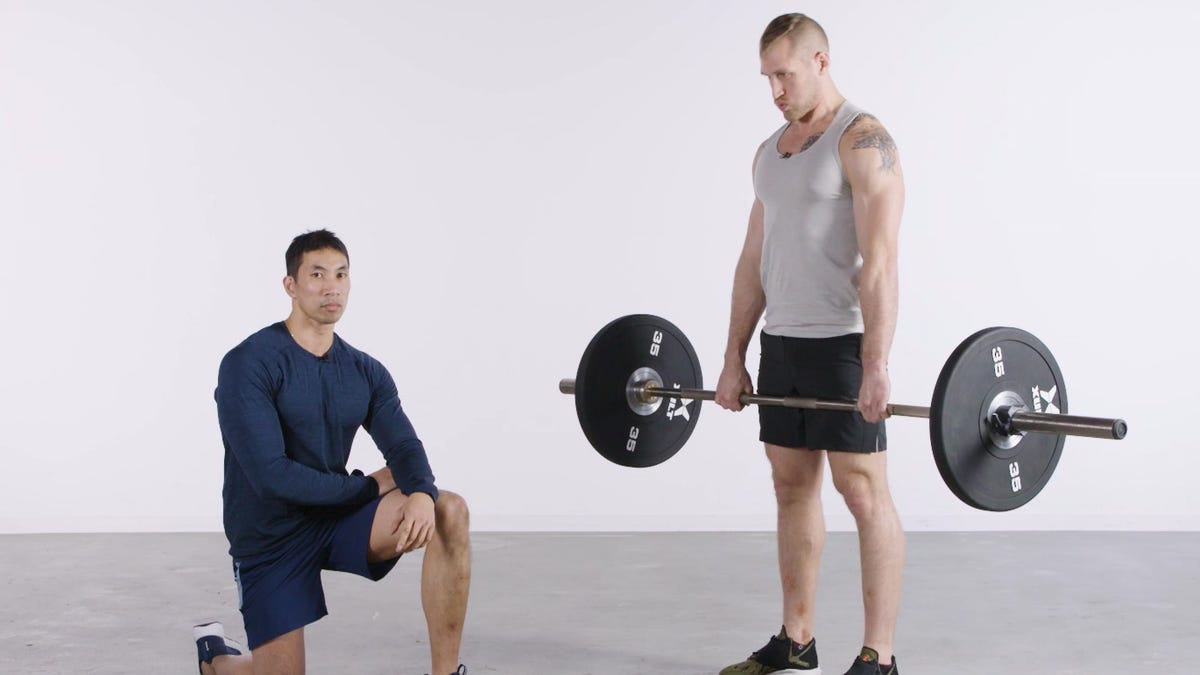
Why: When it’s done right, the deadlift is an excellent back exercise. As you pick up and put down the weight, your upper-back muscles—including your rhomboids, traps, erector spinae, rear deltoids, and lats—must fire on all cylinders to keep your torso straight and your lower back from rounding. It’s when you fail to engage these muscles that injuries can occur.
DO THIS:
●Load a barbell and roll it against your shins.
●Bend at your hips and knees and grab the bar with an overhand grip, your hands just beyond shoulder width.
●Keeping your lower back naturally arched, pull your torso up and thrust your hips forward as you stand up with the barbell.
●Lower the bar to the floor and repeat.
Reps: Start with 3 to 4 sets of 6 to 8 reps. Add load and reduce reps as you gain strength.
Kettlebell Swings
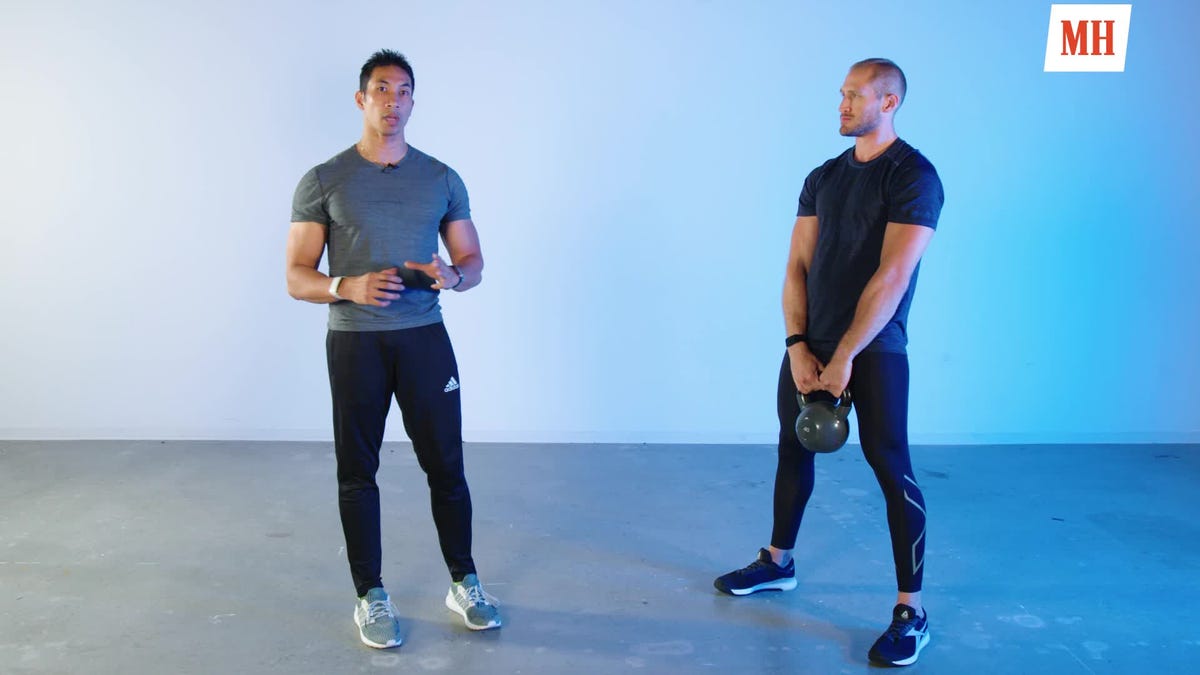
Why: Kettlebell swings work more than just your back’s posterior chain—the move works the front of your core, too. You can start with a light weight to really nail the form, then graduate to heavier loads to develop explosive power and body control.
DO THIS:
●Start with a kettlebell on the ground slightly in front of you. Stand with your feet shoulder-width apart.
●Hinge at your hips and bend your knees slightly to grasp the weight with both hands in an overhand grip, but resist the temptation to bend your knees to squat.
●Keep your spine aligned and your core tight.
●Pull the weight back between your knees, as if you’re snapping a football.
●Swing the kettlebell up by exploding through your hips, straightening your knees, and squeezing your back. Don’t allow the weight to swing above your shoulders.
●Swing powerfully back down between your legs to repeat, maintaining the form.
Reps: Start with 4 sets of 10 to 12 reps, or for time with 5 minutes of 30 seconds on, 30 seconds off
How to Structure Back Training
There are multiple approaches you can take to your back training workouts. If you split up each muscle group individually, like a bodybuilder, you’ll dedicate a full session to only exercises that target your back muscles. A more balanced approach is a push-pull-legs split (or a pull-push-legs split), which instead focuses on training movement patterns on each day. You can also perform full-body workouts, and include a back exercise as a “pull” option.
No matter which of these structure you choose, you should always start with the big compound movement as your first working set. That will be movements like the barbell row, deadlift variations, and even pullups. This will allow you to hit the most demanding movement at your most fresh. After that, slot in less demanding compound movements and isolation exercises. Depending on your split, you’ll train once or twice per week with the heavy compound movements, while other exercises can be included in your workouts more often.
Check out this sample pull day workout, which has a particular focus on the back and biceps.
Back Training Tips
Form First
As with any type of exercise, make sure you’re performing each rep with proper form. This will be especially important for heavy compound movements.
Don’t Rush
Don’t rush through the eccentric part of the exercise. Whether you’re rowing or performing pullups, the “negative” portion of the movement can also be an opportunity to build muscle and strength.
Switch Grips
You can change up some of the focus of your back exercises by shifting between pronated, supinated, and neutral grips. This can be especially effective for your rowing movements; supinated grips will lead to greater biceps involvement.
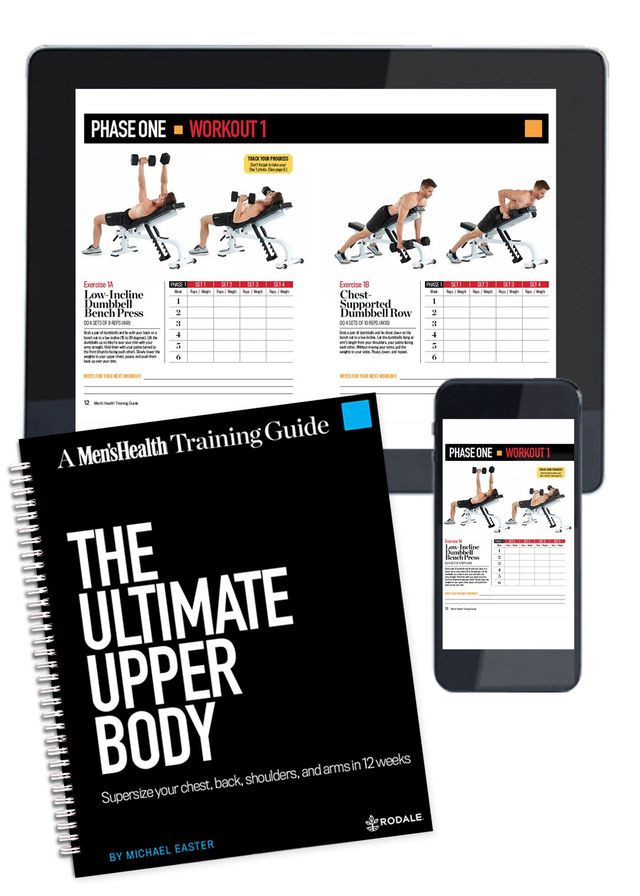
Download The Ultimate Upper Body, an all-new cutting-edge 12-week program designed to helping you sculpt the muscles that get you noticed.
Men’s Health
BUY IT HERE

Brett Williams, a fitness editor at Men’s Health, is a NASM-CPT certified trainer and former pro football player and tech reporter who splits his workout time between strength and conditioning training, martial arts, and running. You can find his work elsewhere at Mashable, Thrillist, and other outlets.
>>> Read full article>>>
Copyright for syndicated content belongs to the linked Source : Men’s Health – https://www.menshealth.com/fitness/a19545838/10-best-back-exercises/


