There are few things more tedious than the back and forth between you and someone you need to meet. They may say they’re free whenever (me) but when you say a time and date, they wince and say that’s actually the only time they can’t get together (also me).
To make coordinating meetings easier, Google has launched a new free Calendar feature called Appointment Schedule. The tool has been available to Google Workspace customers since early 2022, but earlier this month The Big G granted all users access to it—albeit with limitations, depending on whether they’re paying or not.
With Appointment Schedule, you can set up chunks of availability on your calendar so that whoever wants to meet you—be that over a video call or in real life—can pick any time and date within your set parameters. The feature is highly customizable, and setting it up just right is the best way to make it work for you.
How to use Google Calendar’s Appointment Schedule
No matter the type of account you have, you’ll start setting up Appointment Schedule by going to Google Calendar in a web browser and hitting Create in the upper left corner of your screen. On the emerging menu, click Appointment Schedule, and a list of options will appear on the left side of the interface.
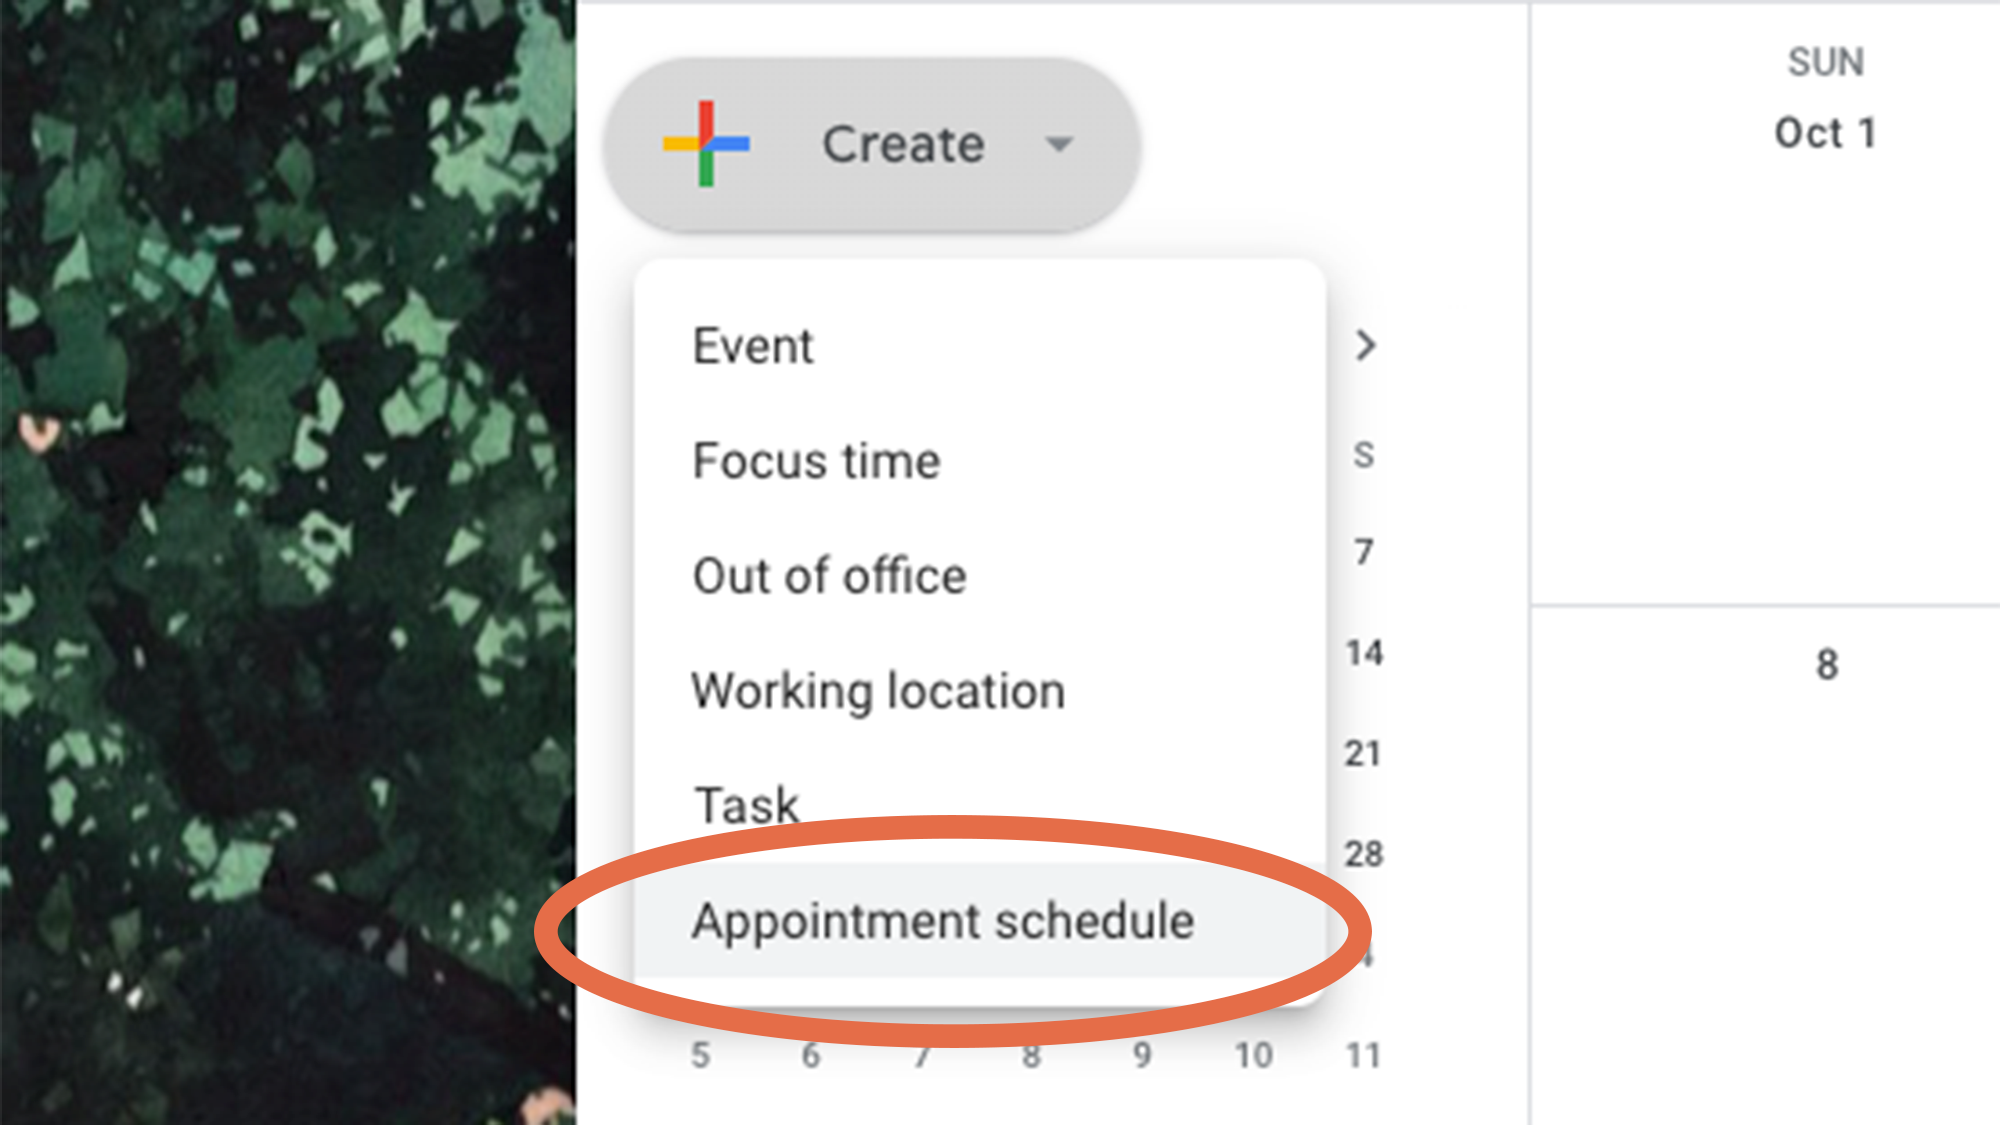 Create your appointment schedule from the same menu you’d create a new event in your calendar.
1. Give your appointment schedule a name. Free-tier users will only be able to create one schedule, whereas paying customers (or those who are part of a Google Workspace organization) can have multiple ones, so naming them will make things easier. Don’t spend too much time on this—you can always change it later.
[Related: What to know about using Google Calendar’s Time Insights feature]
2. Set up an appointment duration. This will be the standard meeting duration. It can go from 5 minutes up to 23.1 hours. Why the extra 6 minutes? Who knows, but you and whoever you’re meeting will surely agree that an appointment that long is not exactly practical or productive. Don’t stress about cutting your meeting short: people can book more than one slot with you per day as long as the daily cap has not been met—more on that later.
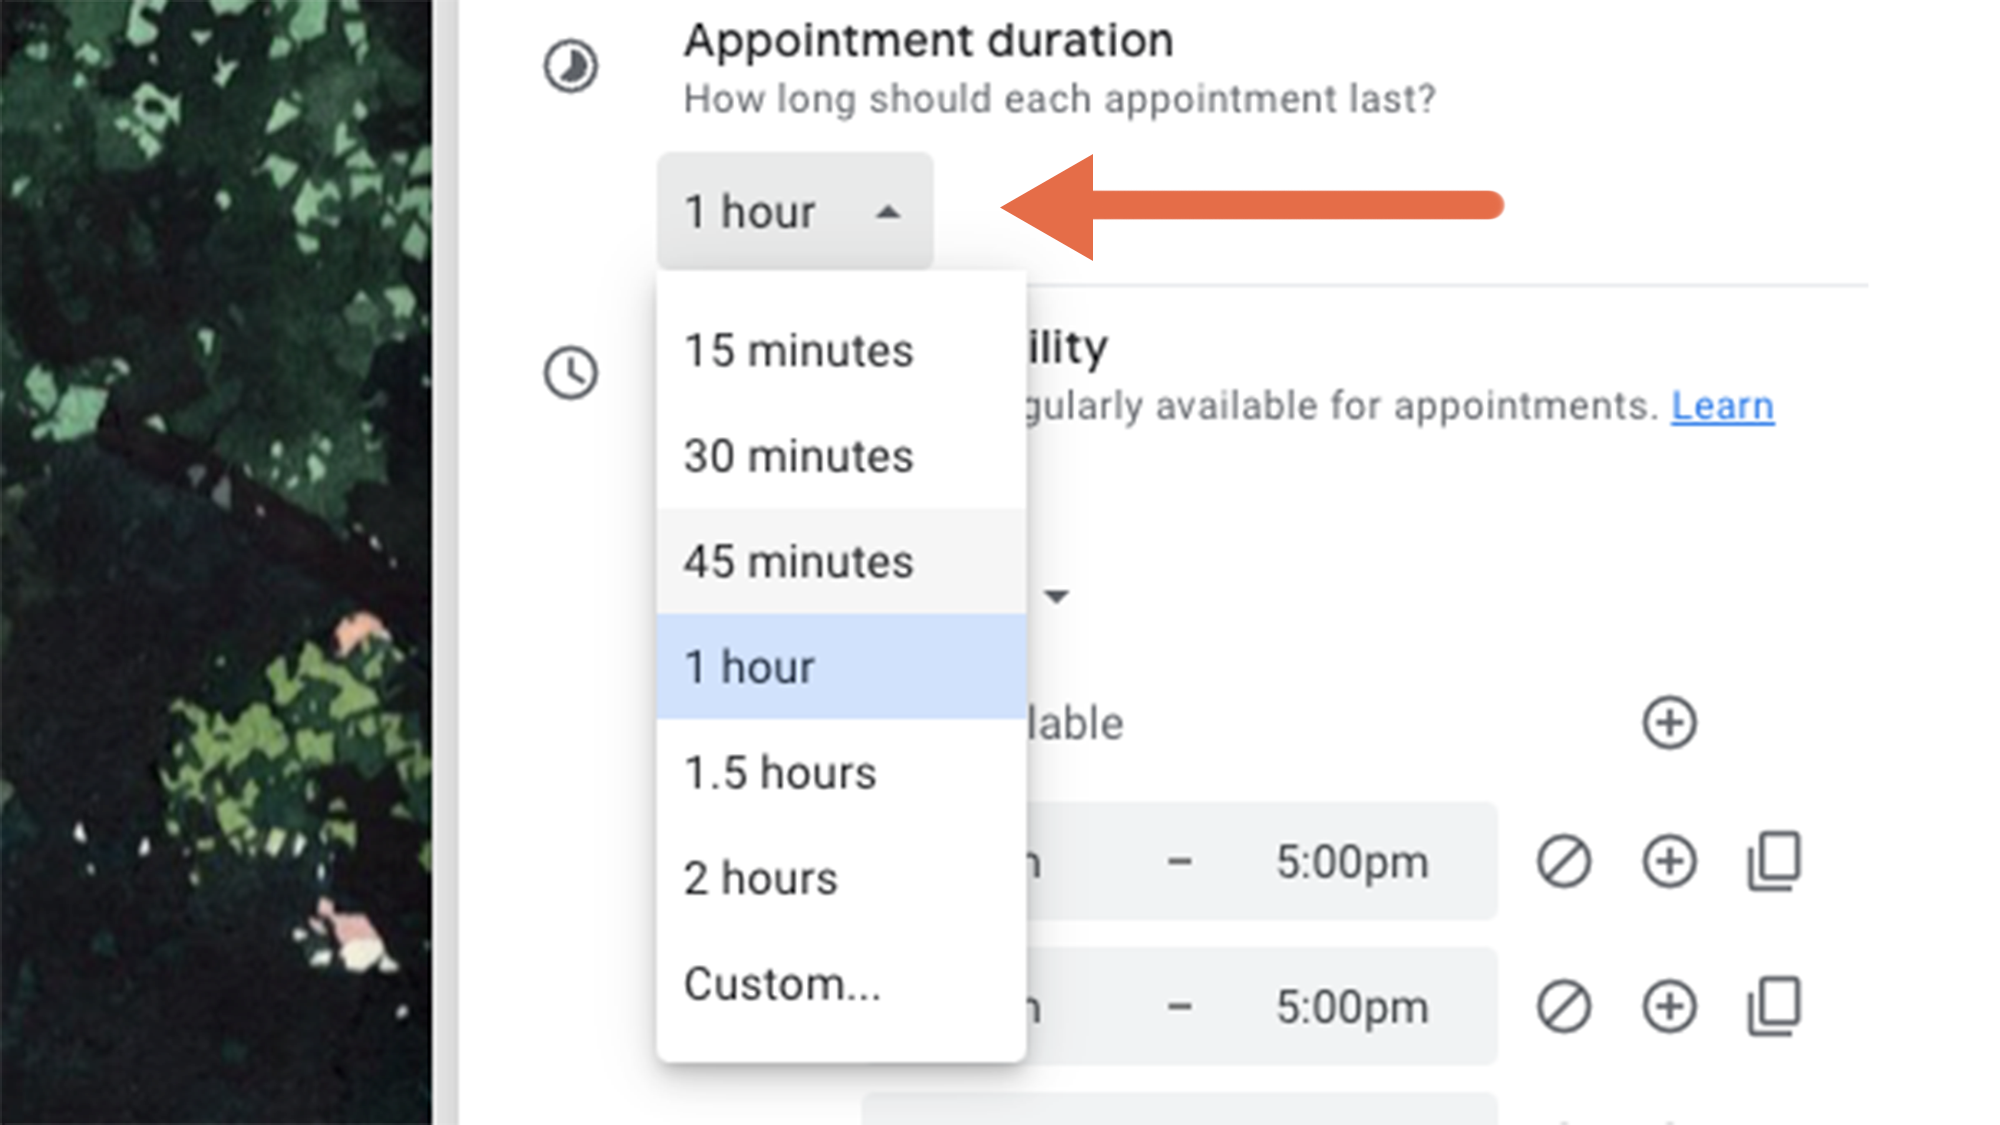 Your appointments can be as short as 5 minutes and as long as… a little past 23 hours. Google Calendar
3. Set up your general availability. Under this setting, you’ll establish the big chunks of time you’re available for meetings. If you want this schedule to run forever until you turn it off, leave the Repeat weekly dropdown menu as it is. But if you just want to set up your availability for the next week, click on it and choose Does not repeat.
Below this, you’ll see a list of the days of the week, and next to each one, start and end times for big availability windows. These are the chunks of time where people will be able to book an appointment with you, and you can add as many to each day as you want by clicking the plus sign to the right of each day. For example, if you’re available all day at the office, you could put down 9 a.m. to 5 p.m., but if you don’t want anybody to bother you from noon until 1:30 p.m., you can set up two availability windows around that. Once that’s done, you don’t have to repeat the settings for each day of the week—click the copy icon on the right (two rectangles on top of each other) and it’ll automatically replicate your general availability Monday through Friday.
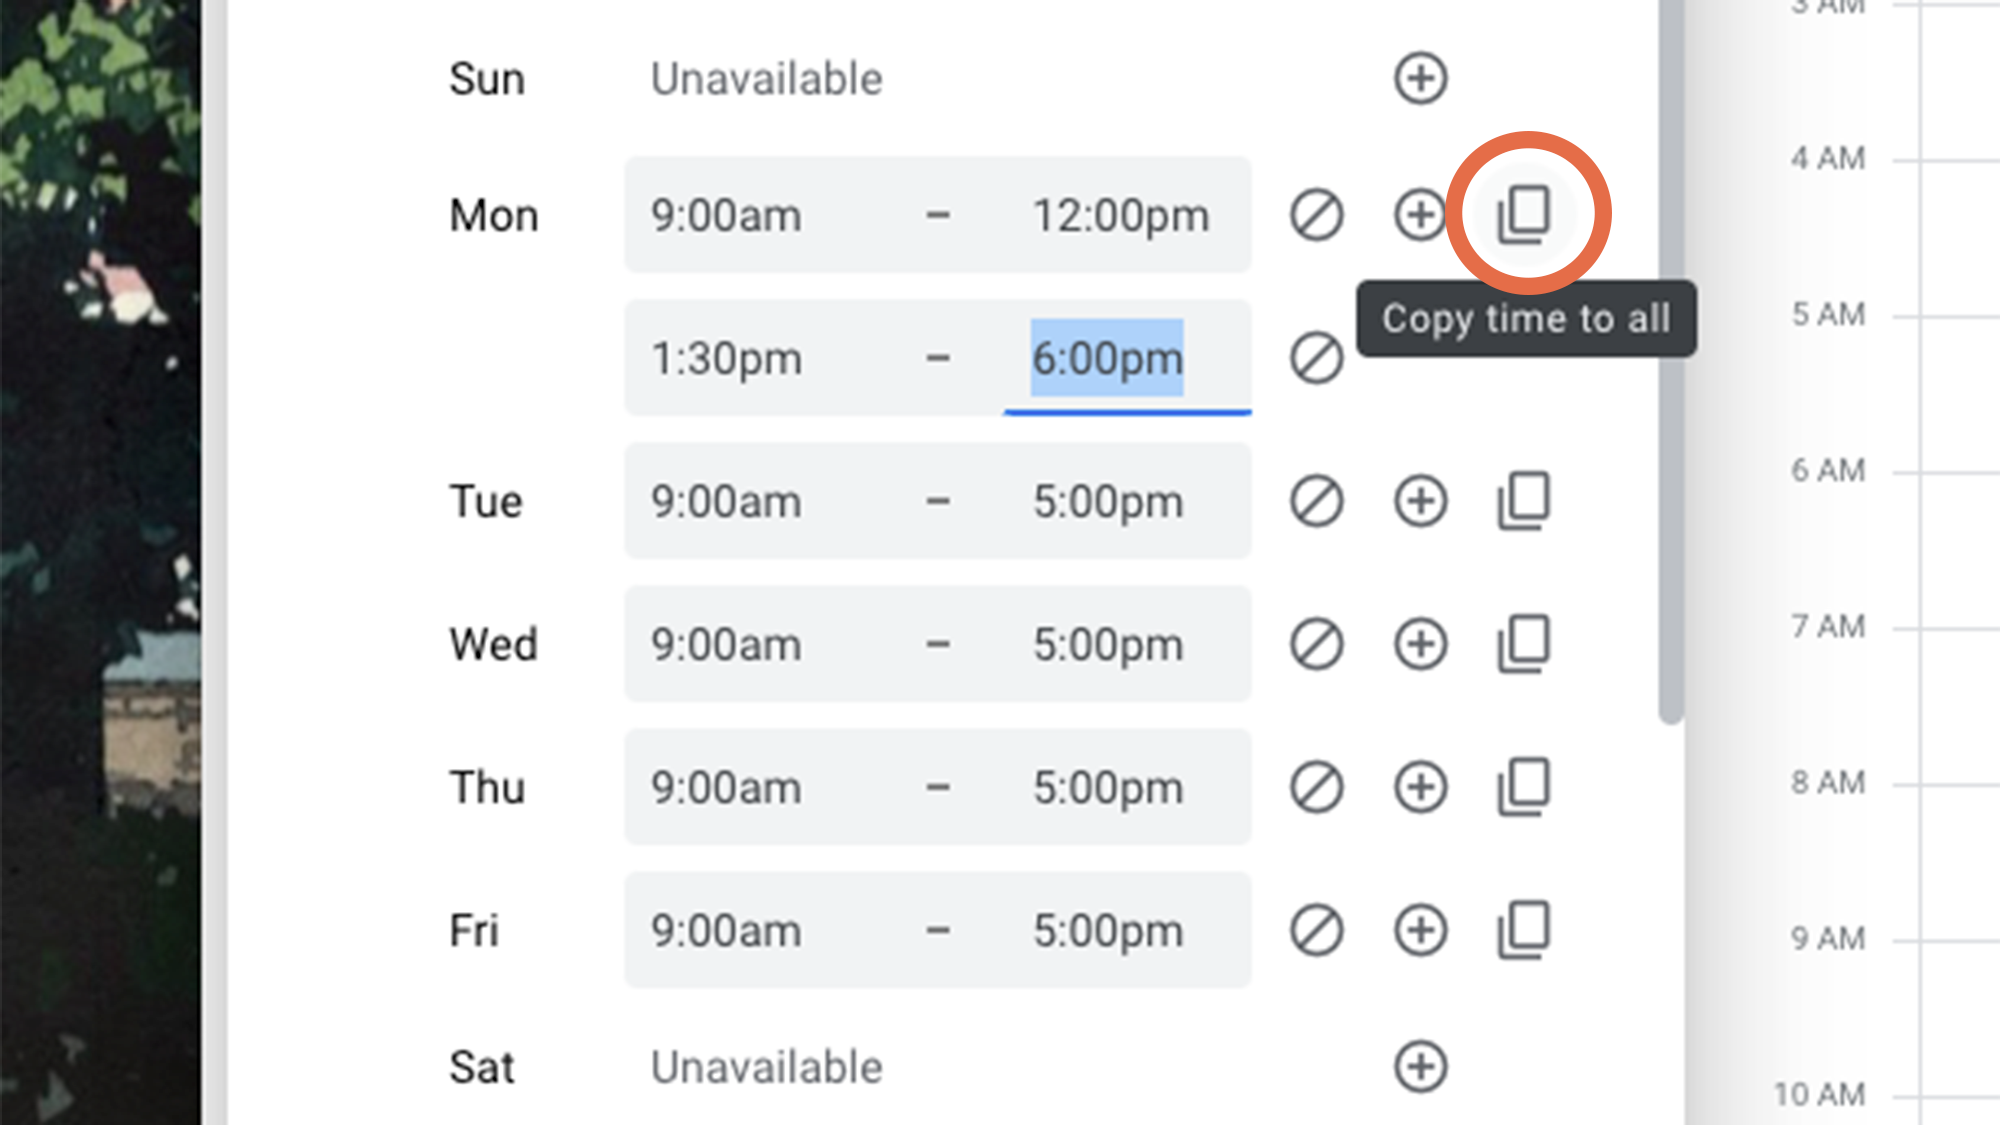 Prevent anyone from interrupting your midday walk by building your availability around it. Google Calendar
Note that by default, Saturday and Sunday will be set as unavailable for meetings, but clicking the plus sign will change that.
4. Adjust scheduling. The next menus will let you fine-tune details of how you want Appointment Schedule to work. For example, you’ll be able to set when it kicks in (select Available Now under Scheduling window, or Start and end dates) and how far in advance people can book time with you (up to a year).
You can also tweak Adjusted availability for specific dates where you’d normally be able to meet. This works exactly like the general availability option, but instead of days of the week, you’ll choose specific dates. So, if your teeth cleaning falls during a time you’ve marked yourself as generally available, you can add that date here and adjust your schedule as needed.
If you need time to prepare for each meeting or just want to prevent your day from becoming an endless parade of people asking you questions, you can limit your availability time by setting up a Buffer time and Maximum bookings per day. The latter will set a cap of daily meetings, and you’ll appear as unavailable when that cap is met.
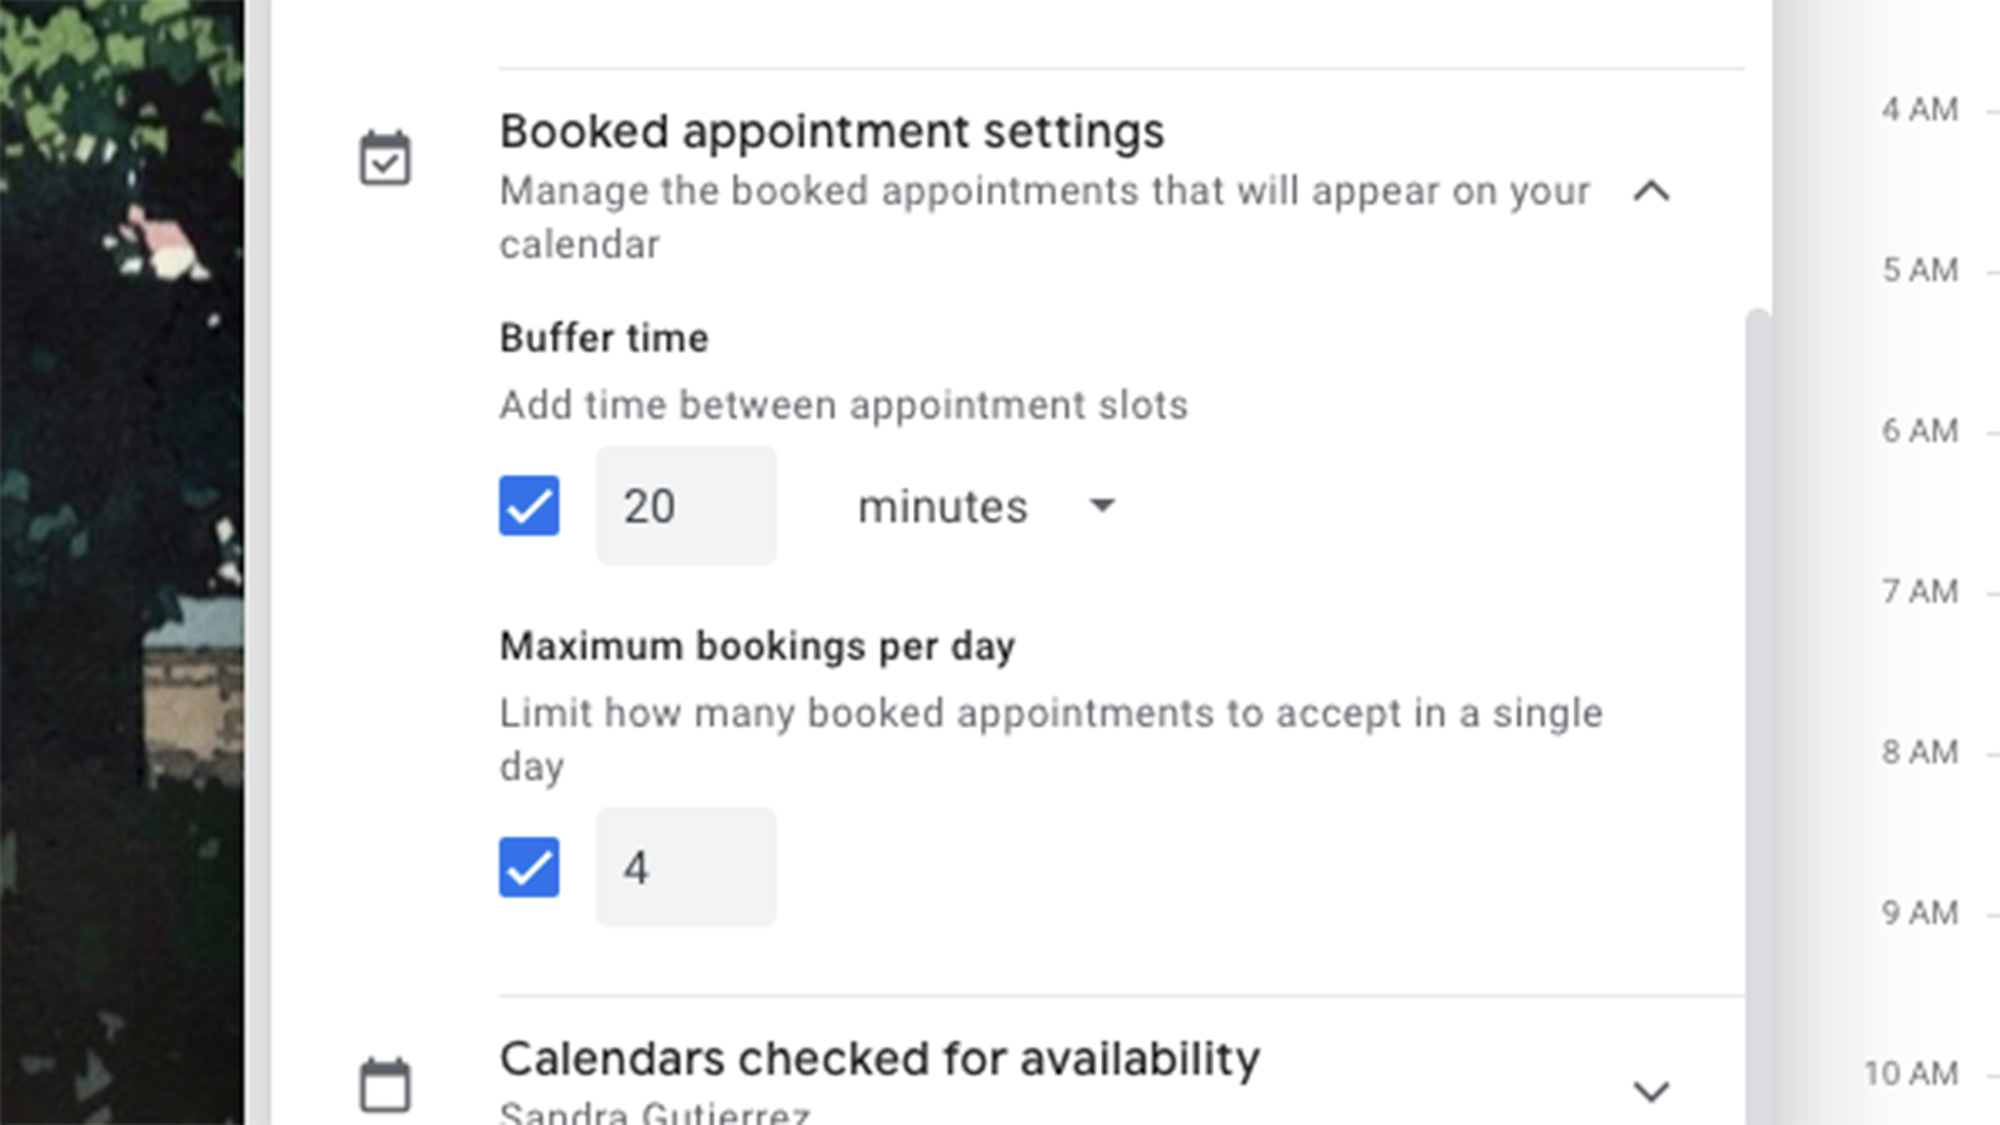 Give yourself a 5-minute break in between meetings. You deserve it. Google Calendar
5. Choose how Google Calendar determines if you’re busy. Your appointment schedule will always check your Google Calendar to see if you’re busy so that there’s no overlap with any other meetings you might’ve accepted.
But here’s the catch: If you’re not a paying Google user and have more than one calendar (a personal and a work one, for example), you will only be able to pick one of them to define availability. Paying Google account holders and members of Workspace organizations don’t have to choose, so they can continue to compartmentalize their lives in a more practical way.
When you’re done with these settings, click Next to continue.
6. Edit your Appointment schedule details. On the following menu, you’ll find more settings you can mess around with:
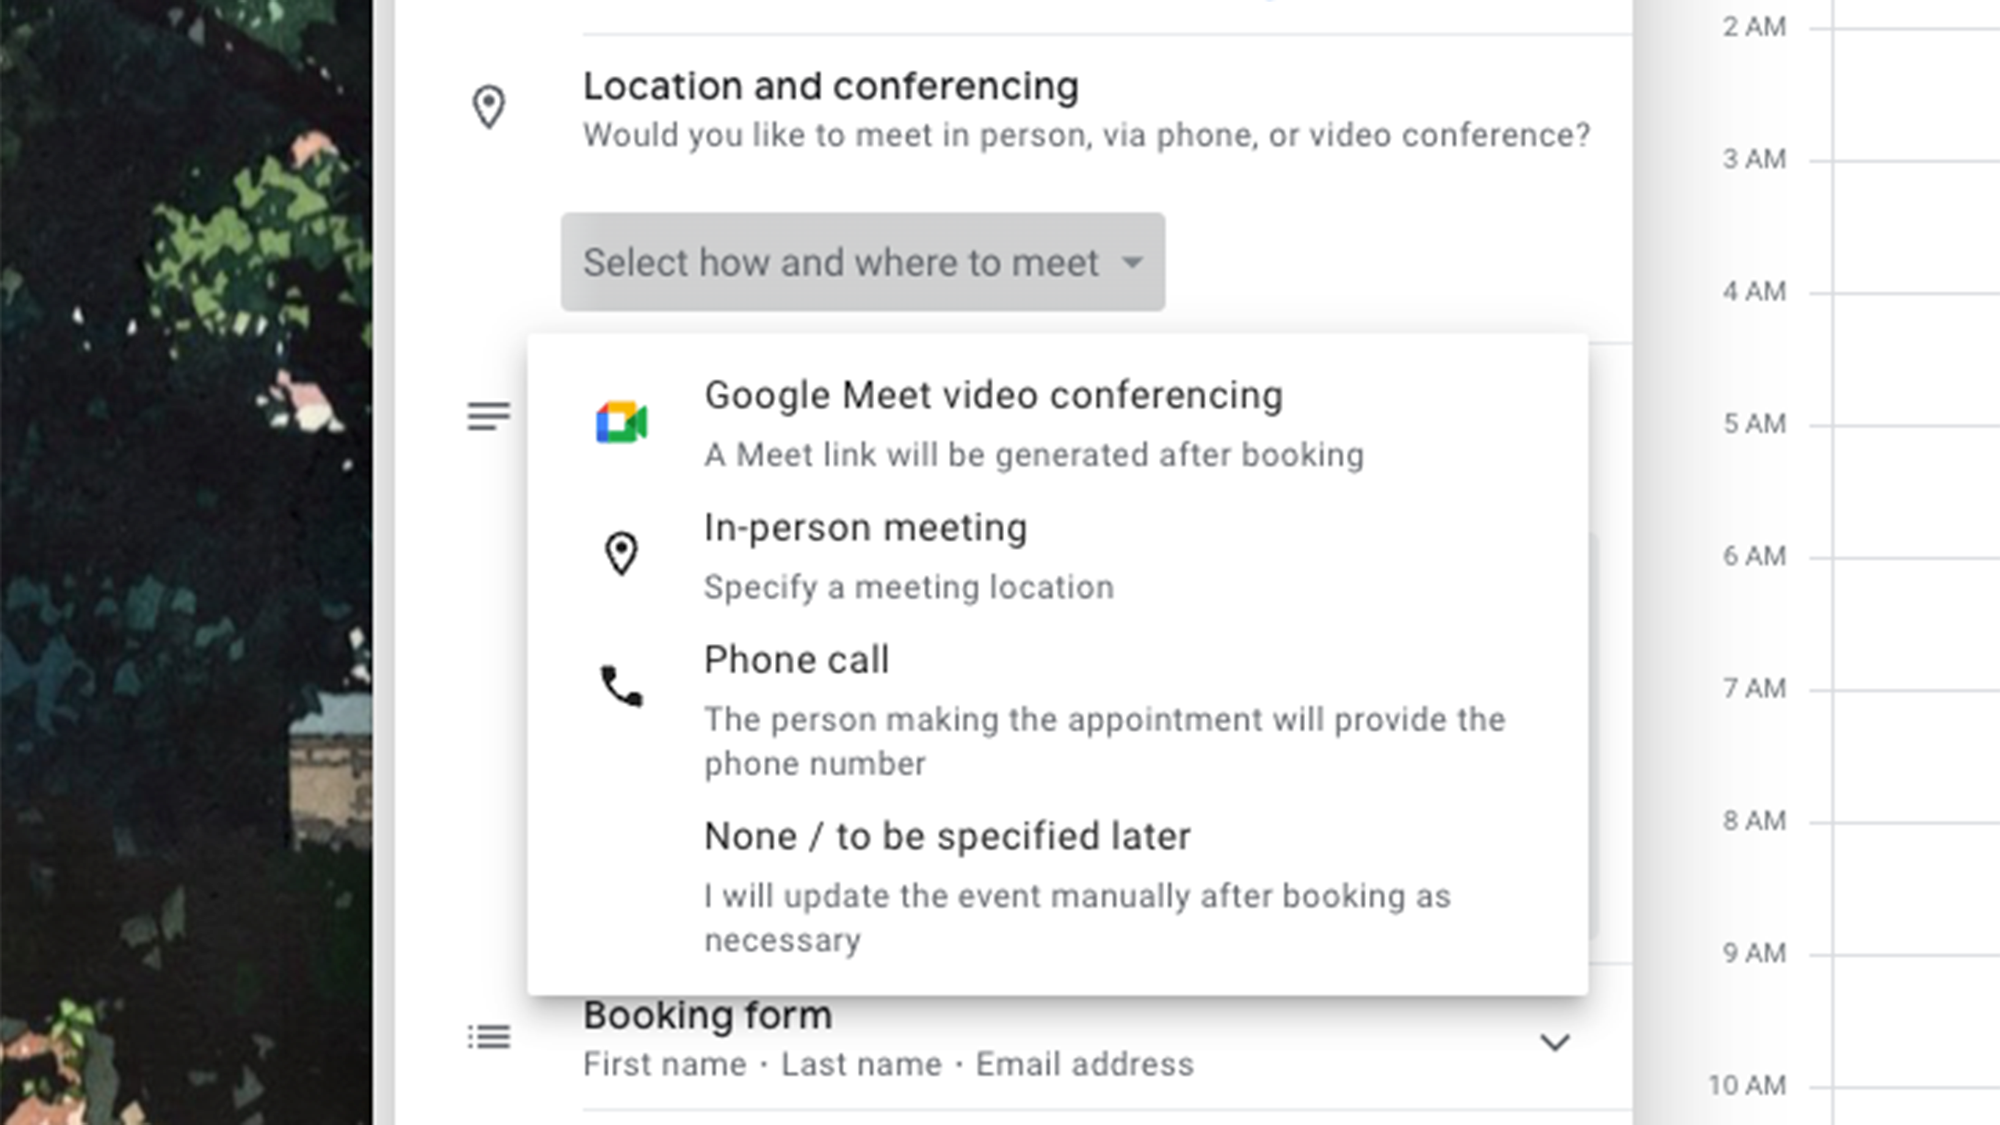 The last option might also be called “Nah, we’ll figure it out”. Google Calendar
Booking page photo and name: Your booking page is what people will see when they want to book time with you. The name and photo you use for your Google account will appear there, so if you want something that looks professional, make sure you change these settings in the My Account page.
Location and conferencing: Tweak this to establish where you’d prefer to meet the person booking your time. You can choose to have the platform automatically generate a Google Meet link upon booking, specify a physical place (your office, for example), or transform all of your meetings into phone calls. You can also choose None / to be specified later so you and your guests can decide how you’ll meet.
Description: Here you can say anything you want about your meeting. Maybe you want to make it clear to your students that you won’t be responding to questions about their latest exam, or you want to let people know about the price of your services. Yes—if you’re a Google Workspace subscriber you can also set up a Stripe account to receive payment for your time.
7. Set up a booking form. Under Booking form, you’ll be able to specify all the fields guests have to fill before booking time with you. By default, Google Calendar requires their first and last name, as well as their email address, but you can add more if you want. Click Add item—you’ll be able to ask people to provide their phone numbers or fill out a custom field, like their preference of coffee shop. Check the box next to Required to make something mandatory and finish by clicking Add item.
On this menu, paying Google users will also see the option to require email verification. Click the box beside it to have people verify their emails when booking time with you using a non-Google email account. This extra step might be annoying for some, but it’s also extremely useful to prevent malicious bookings, especially if your booking page lives in a public place, like a social media bio.
8. Make sure your guests know about your meeting. Now, choose whether you want to remind the people booking time with you about their appointment. Free-tier users will only be able to send guests a confirmation upon scheduling, whereas paying Google customers will be able to blast out as many email reminders as they want.
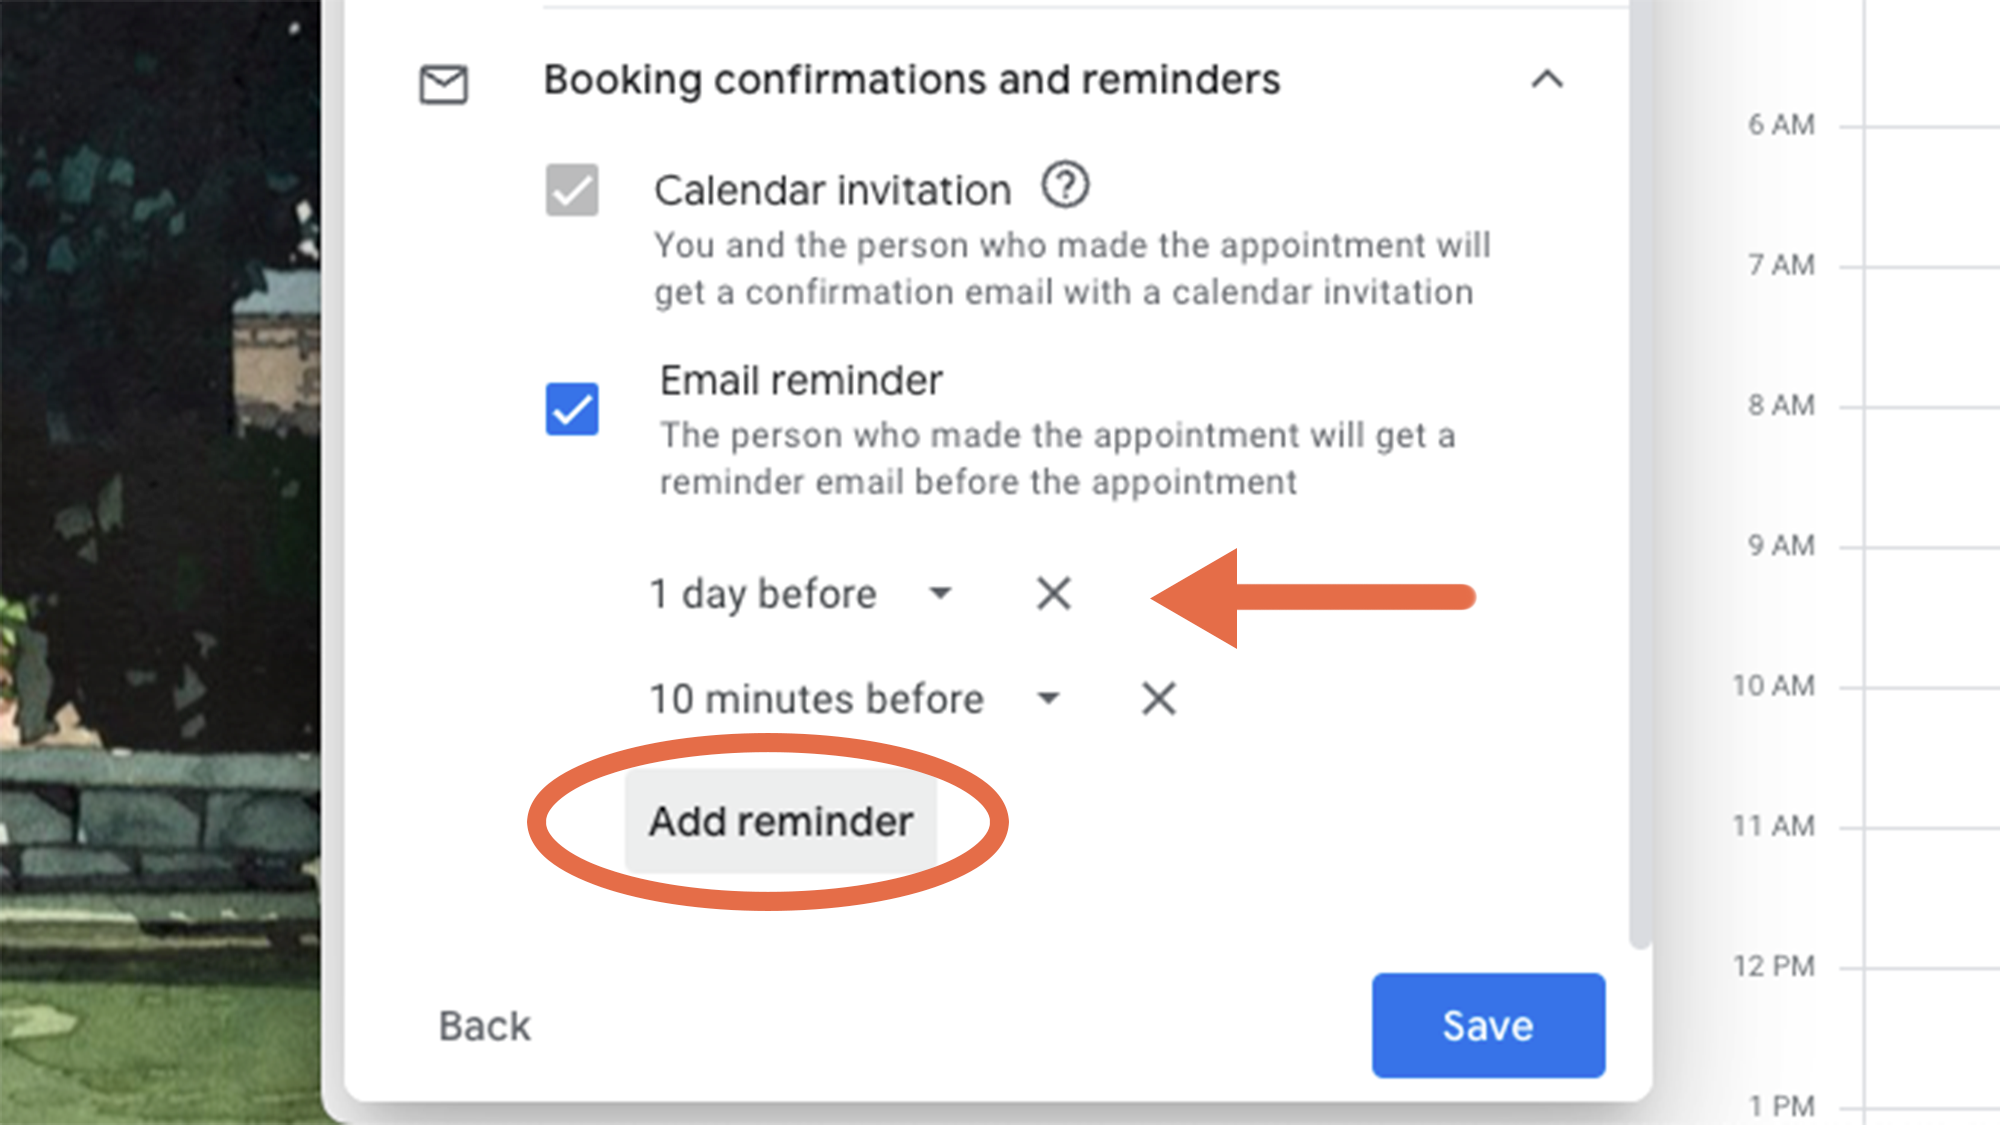 If you’re a paying Google customer you can send your guests multiple reminders about your appointment. Google Calendar
By default, the box next to Email reminder will be selected and set to send a message a day before the scheduled appointment. Click on the dropdown menu to choose another time frame or create a custom one. If you want to send more than one note, hit Add reminder.
Finally, hit Save to finish setting up your appointment schedule.
How to edit Appointment Schedule on Google Calendar
With all of those settings, you might expect there to be an easy-to-access page where you can go back to the Appointment Schedule creation menu—there is not. To tweak any details of your appointment schedule on Google Calendar, you’ll need to find its name on the calendar (think of it as a single event that repeats itself), open it, and click the pencil icon.
Note that you might find multiple entries of your appointment schedule on a single day. This happens because the name of your appointment schedule will always appear on days when there are time slots to be booked, but there will also be specific appointments that were already scheduled. You’ll know the difference because the former will have a four-square icon next to it, while the latter will have the name of the person who booked the slot inside parentheses to the right of it.
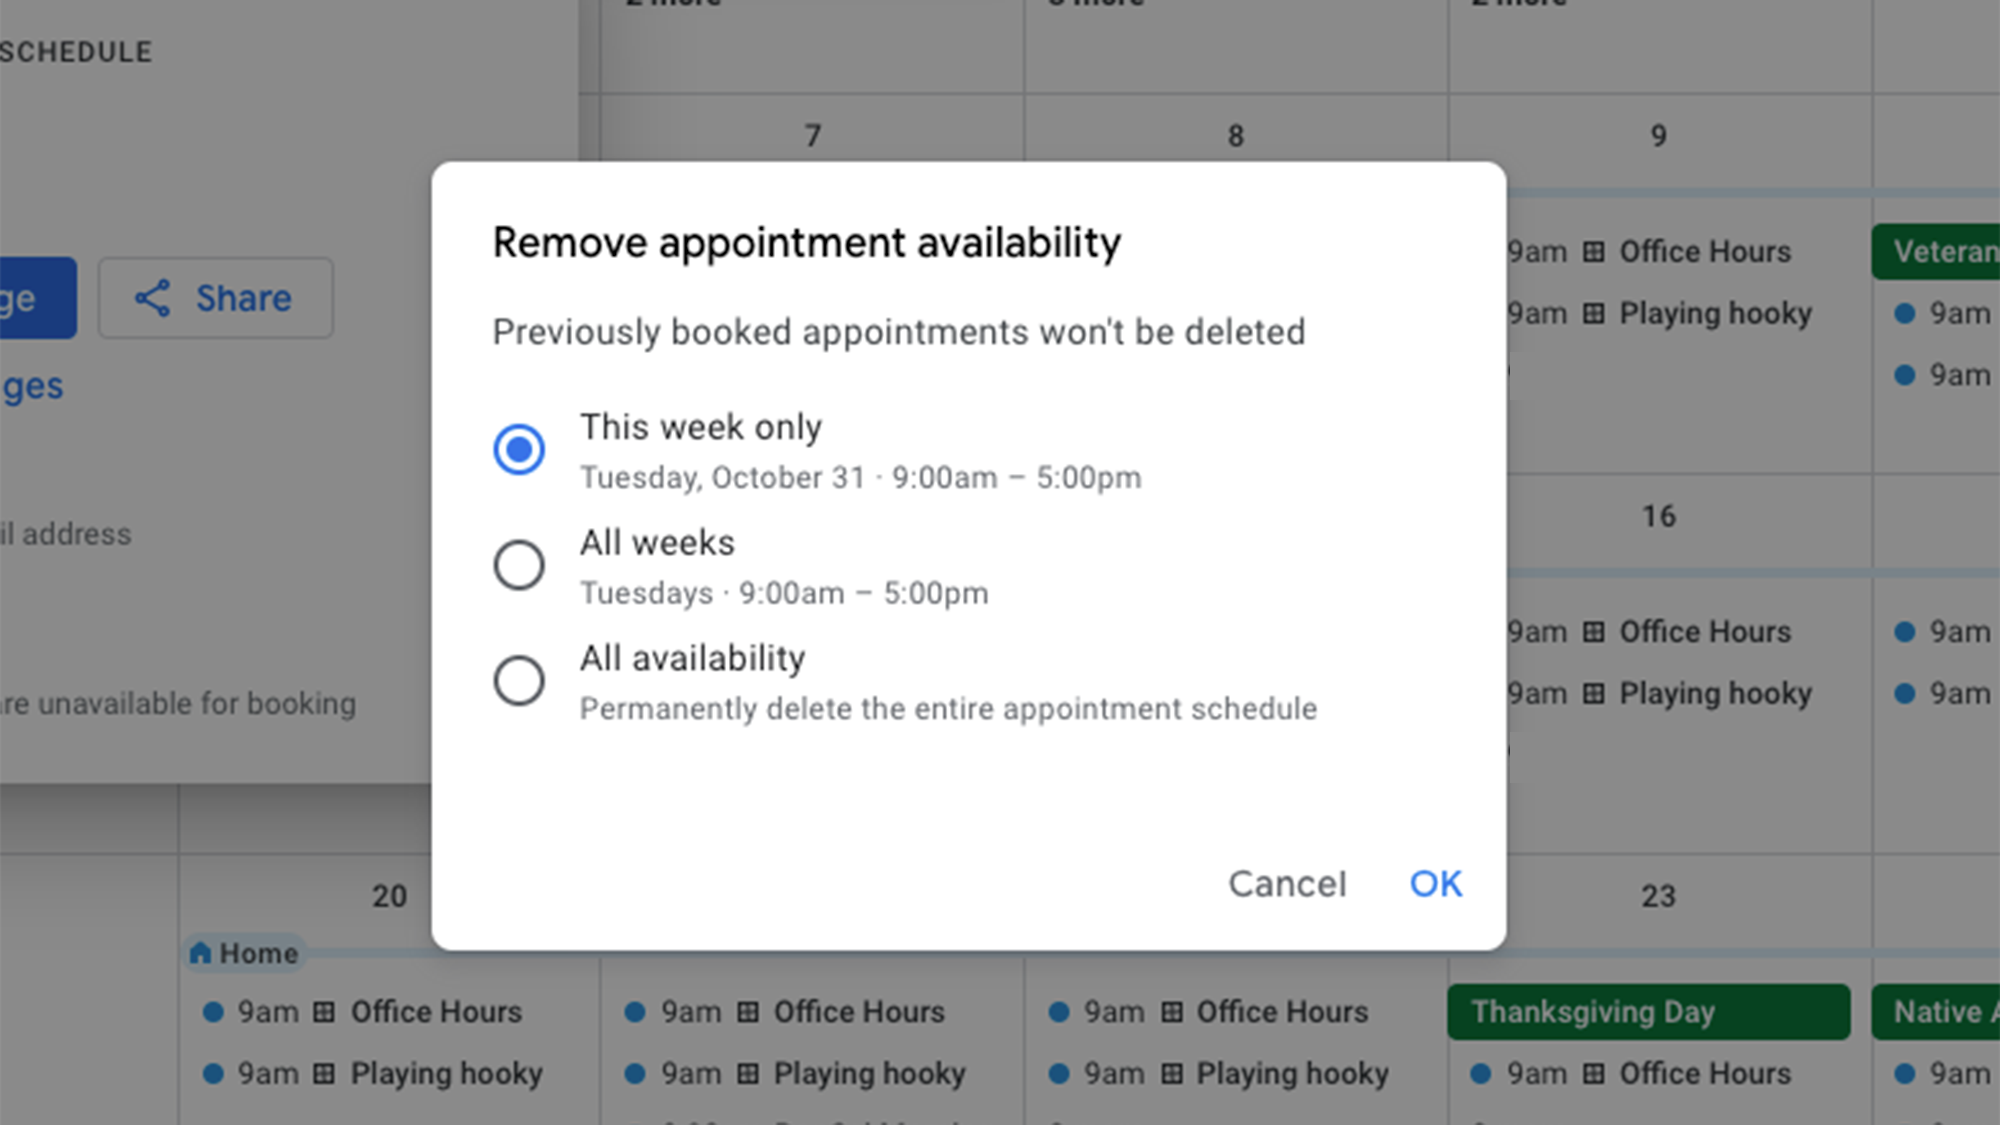 You can delete your appointment schedule partially or completely. Just make sure you select the right option. Google Calendar
When you open Appointment Schedule from the Calendar view, you’ll also see a trash can icon—click it to get rid of your bookable schedule partially or entirely. On the next menu, you’ll be able to delete that day specifically (This week only), that day in all upcoming weeks (All weeks), or erase the schedule entirely (All availability). Check the bubble next to the option you want and hit Save.
How to invite people to schedule an appointment with you on Google Calendar
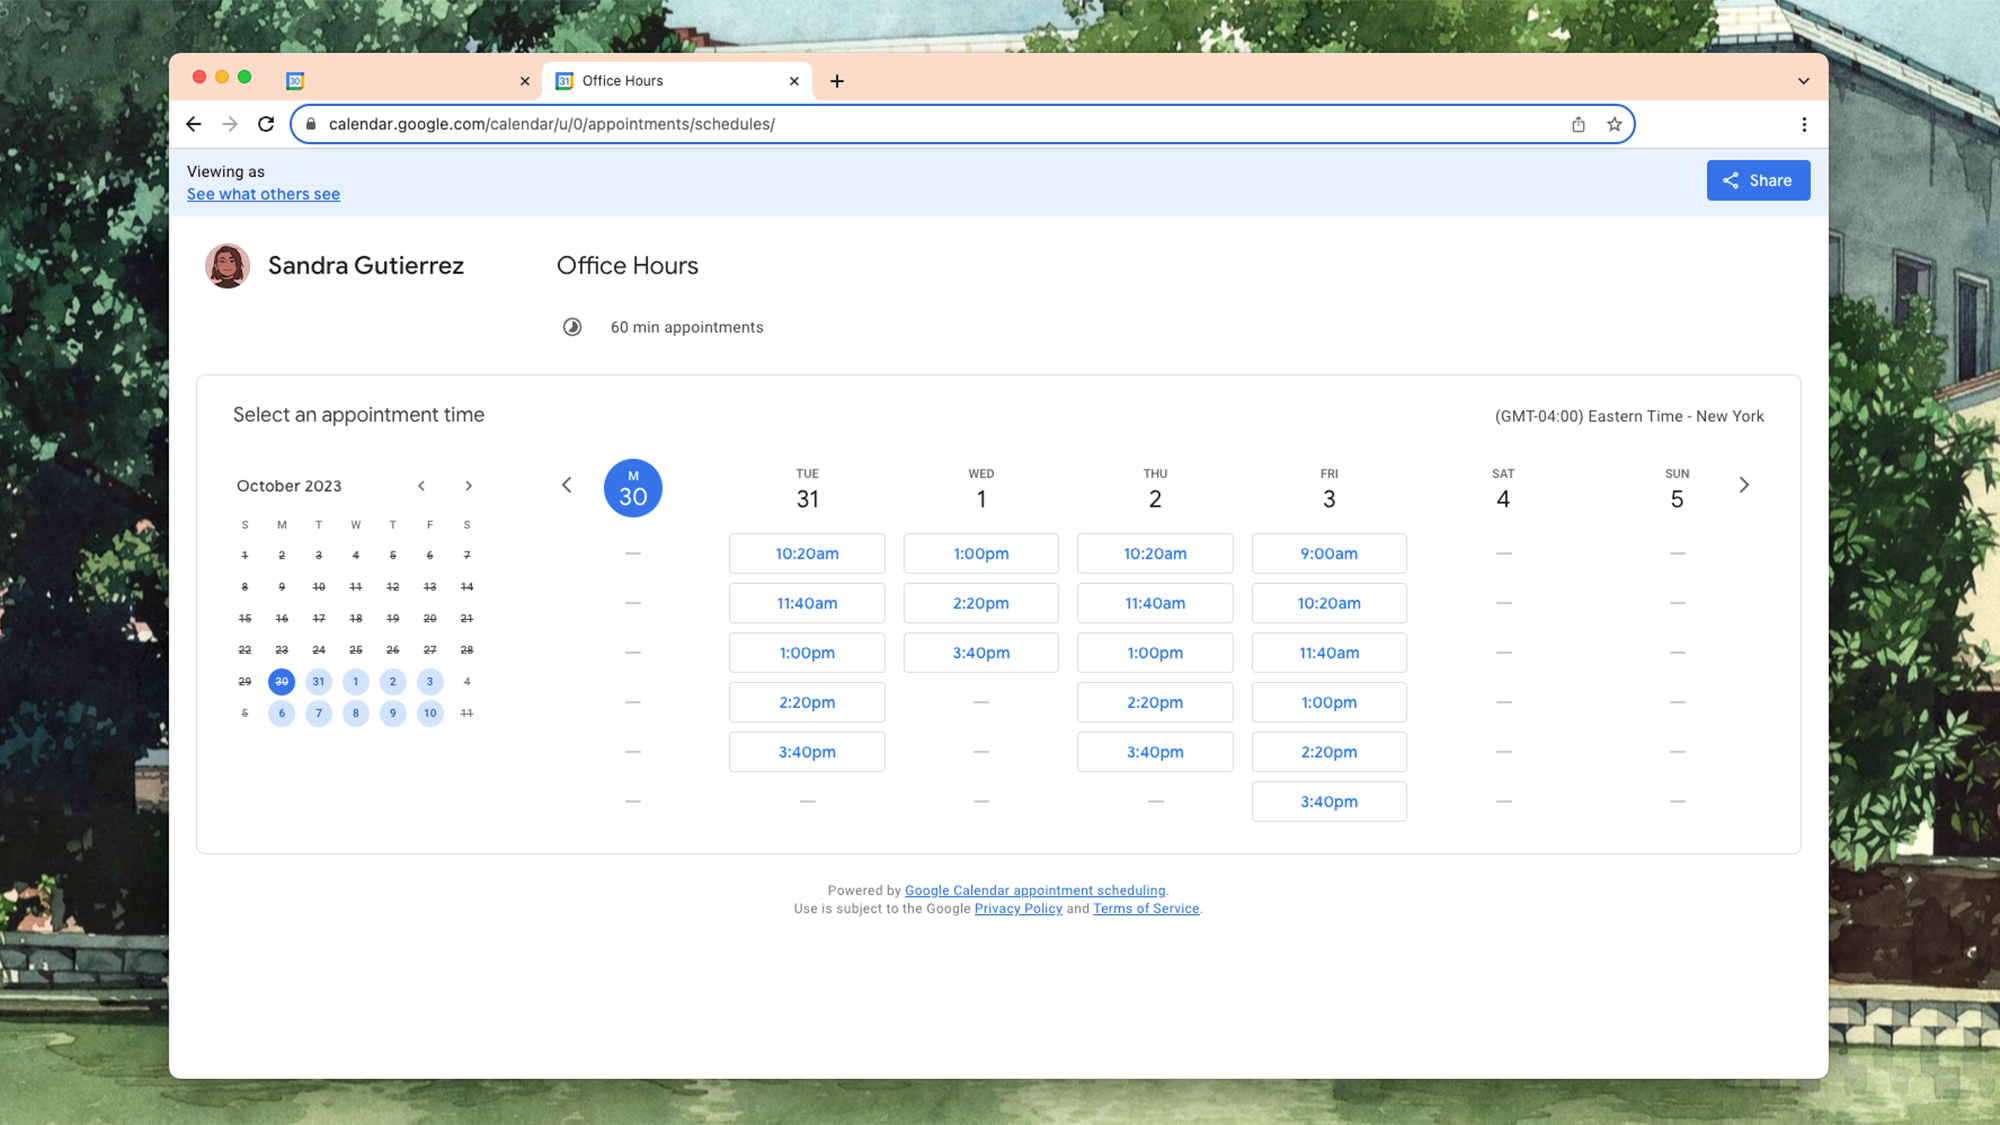 This is what your booking page will look like to people wanting to meet with you. Google Calendar
To let people book time with you on Google Calendar, you’ll need to direct them to your booking page. This is a simple website where they’ll be able to navigate your availability and choose the time that works best for them. Note that they’ll only be able to see when you’re free to meet, but won’t see any details of your calendar.
[Related: Syncing Google and Apple calendars is less annoying now]
To share this link, open your appointment schedule from Google Calendar and click Open booking page. From there, hit the Share button in the top right corner of your screen—click Copy link to copy the URL to your clipboard and share it with whoever you want on a platform of your choosing, such as email, text message, or social media. You can also go to the Website embed tab to get an embed code that will allow you to add a widget to your webpage that people can click to book time with you.
>>> Read full article>>>
Copyright for syndicated content belongs to the linked Source : Popular Science – https://www.popsci.com/diy/google-calendar-appointment-schedule/


